An Introduction to JavaServer Faces (JSF) 7
What do we have in this session 7?
-
Applying a Facelets Template
-
Creating the Facelets Template File
Applying a Facelets Template
Facelets has become the standard display technology for JSF 2.0. Facelets is a light-weight templating framework that supports all of the JSF UI components and is used to build and render the JSF component tree for application views. It also provides development support when EL errors occur by enabling you to inspect the stack trace, component tree, and scoped variables.
Although you may not have realized it, the index.xhtml and response.xhtml files you have been working with so far in the tutorial are Facelets pages. Facelets pages use the .xhtml extension and since you are working in a JSF 2.0 project (The JSF 2.0 libraries include the Facelets JAR files.), the views were able to appropriately render the JSF component tree.
The purpose of this section is to familiarize you with Facelets templating. For projects containing many views, it is often advantageous to apply a template file that defines the structure and appearance for multiple views. When servicing requests, the application inserts dynamically prepared content into the template file and sends the result back to the client. Although this project only contains two views (the welcome page and the response page), it is easy to see that they contain a lot of duplicated content. You can factor out this duplicated content into a Facelets template, and create template client files to handle content that is specific to the welcome and response pages.
The IDE provides a Facelets Template wizard for creating Facelets templates, and a Facelets Template Client wizard for creating files that rely on a template. This section makes use of these wizards.
Note: The IDE also provides a JSF Page wizard that enables you to create individual Facelets pages for your project. For more information, see JSF 2.0 Support in NetBeans IDE.
|
|
Creating the Facelets Template File
1. Create a Facelets template file. Press Ctrl-N (⌘-N on Mac) to open the File wizard. Select the JavaServer Faces category, then Facelets Template. Click Next.
|

2. Type in template for the file name.
3. Choose from any of the eight layout styles and click Finish. (You will be using the existing stylesheet, so it doesn't matter which layout style you choose.)

The wizard generates the template.xhtml file and accompanying stylesheets based on your selection, and places these in a resources > css folder within the project's webroot.
After completing the wizard, the template file opens in the editor. To view the template in a browser, right-click in the editor and choose View.


Examine the template file markup. Note the following points:
a) The facelets tag library is declared in the page's <html> tag. The tag library has the ui prefix.
<html xmlns="http://www.w3.org/1999/xhtml"
xmlns:ui="http://java.sun.com/jsf/facelets"
xmlns:h="http://java.sun.com/jsf/html">
b) The Facelets page uses the <h:head> and <h:body> tags instead of the html <head> and <body> tags. By using these tags, Facelets is able to construct a component tree that encompasses the entire page.
c) The page references the stylesheets that were also created when you completed the wizard.
<h:head><meta http-equiv="Content-Type" content="text/html; charset=UTF-8" /><link href="./resources/css/default.css" rel="stylesheet" type="text/css" /><link href="./resources/css/cssLayout.css" rel="stylesheet" type="text/css" /><title>Facelets Template</title></h:head>
d) <ui:insert> tags are used in the page's body for every compartment associated with the layout style you chose. Each <ui:insert> tag has a name attribute that identifies the compartment. For example:
<div id="top"><ui:insert name="top">Top</ui:insert></div>
e) Reexamine the welcome (index.xhtml) and response (response.xhtml) pages. The only content that changes between the two pages is the title and the text contained in the grey square. The template, therefore, can provide all remaining content.
f) Replace the entire content of your template file with the content below.
<?xml version='1.0' encoding='UTF-8' ?><!DOCTYPE html PUBLIC "-//W3C//DTD XHTML 1.0 Transitional//EN" "http://www.w3.org/TR/xhtml1/DTD/xhtml1-transitional.dtd"><html xmlns="http://www.w3.org/1999/xhtml"xmlns:ui="http://java.sun.com/jsf/facelets"xmlns:h="http://java.sun.com/jsf/html"><h:head><meta http-equiv="Content-Type" content="text/html; charset=UTF-8" /><link href="css/stylesheet.css" rel="stylesheet" type="text/css" /><title><ui:insert name="title">Facelets Template</ui:insert></title></h:head><h:body><div id="left"><ui:insert name="box">Box Content Here</ui:insert></div></h:body></html>
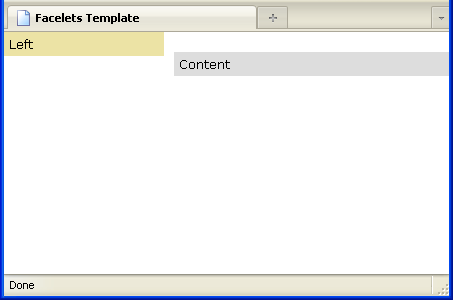
The following is the screenshot.
----------------------------------------------------------------

The above code implements the following changes:
- The project's stylesheet.css file replaces the template stylesheet references created by the wizard.
- All <ui:insert> tags (and their containing <div> tags) have been removed, except for one named box.
- An <ui:insert> tag pair has been placed around the page title, and named title.
g) Copy relevant code from either the index.xhtml or response.xhtml file into the template. Add the content shown in bold below to the template file's <h:body> tags.
<h:body><div id="mainContainer"><div id="left" class="subContainer greyBox"><ui:insert name="box">Box Content Here</ui:insert></div><div id="right" class="subContainer"><img src="duke.png" alt="Duke waving" /></div></div></h:body>
The following is the screenshot.

Run the project. When the welcome page opens in the browser, modify the URL to the following:
http://localhost:8080/jsfDemo/faces/template.xhtml
The template file displays as follows:

The project now contains a template file that provides the appearance and structure for all views. You can now create client files that invoke the template.