An Introduction to JavaServer Faces (JSF) 6
What do we have in this session 6?
-
The response.xhtml File
|
|
The response.xhtml File
1. Open the response.xhtml page in the editor. Either double-click the response.xhtml node from the Projects window, or press Alt-Shift-O to use the Go to File dialog. 2. Comment out the HTML form element by highlighting the opening and closing HTML <form> tags and the code between them, then press Ctrl-/ (⌘-/ on Mac). Note: To highlight, either click and drag in the editor with your mouse, or, using the keyboard, hold Shift and press the arrow keys.
3. Uncomment the JSF HTML form component. Highlight the opening and closing <h:form> tags and the code between them, then press Ctrl-/ (⌘-/ on Mac).
|
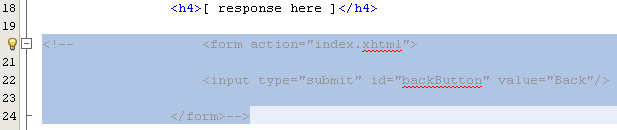

4. At this stage, your code between the <body> tags looks as follows:
<body><div id="mainContainer"><div id="left" class="subContainer greyBox"><h4>[ response here ]</h4><!--<form action="index.xhtml"><input type="submit" id="backButton" value="Back"/></form>--><h:form><h:commandButton id="backButton" value="Back" /></h:form></div><div id="right" class="subContainer"><img src="duke.png" alt="Duke waving" /><!--<h:graphicimage url="/duke.png" alt="Duke waving" />--></div></div></body>
After uncommenting the JSF HTML form component, the editor indicates that the <h:form> and <h:commandButton> tags haven't been declared.
To declare these components, use the IDE's code completion to add the tag library namespace to the page's <html> tag.
Use the editor's code completion support to add required JSF namespaces to the file. When selecting a JSF or Facelets tag through code completion, the required namespace is automatically added to the document's root element. For more information, see JSF 2.0 Support in NetBeans IDE.
Place your cursor on any of the undeclared tags and press Ctrl-Space. Code completion suggestions and documentation support displays.

Click Enter. (If there are multiple options, make sure to select the tag that is displayed in the editor before clicking Enter.) The JSF HTML tag library namespace is added to the <html> tag (shown in bold below), and the error indicators disappear.
<html xmlns="http://www.w3.org/1999/xhtml"
xmlns:h="http://java.sun.com/jsf/html">

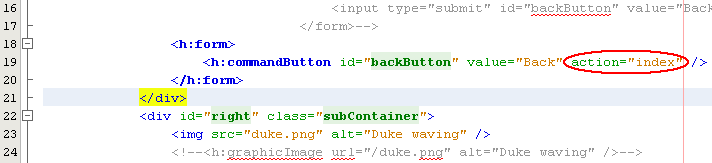
Specify the destination for the request that is invoked when the user clicks the form button. You want to set the button so that when a user clicks it, he or she is returned to the index.xhtml page. To accomplish this, use the commandButton's action attribute. Type in the code displayed in bold.
<h:form>
<h:commandButton id="backButton" value="Back" action="index" />
</h:form>
-------------------------------------------------------------------------------------------------------
Note: By typing action="index", you are relying on JSF's implicit navigation feature. When a user clicks the form button, the JSF runtime searches for a file named index.xhtml. It assumes the file extension is the same as the extension used by file from which the request originated (response.xhtml) and looks for the index.xhtml file in the same directory as the originating file (i.e., the webroot).
Replace the static "[ response here ]" text with the value of the UserNumberBean's response property. To do this, use the JSF expression language. Enter the following (in bold).
<div id="left" class="subContainer greyBox">
<h4><h:outputText value="#{UserNumberBean.response}"/></h4>
![Replacing the static [ response here ] text with the value of the UserNumberBean's response property](netbeans89jsfjavawebapplication_files/netbeans89jsfjavawebapplication076.png)
Run the project (click the
Run Project (
![]() )
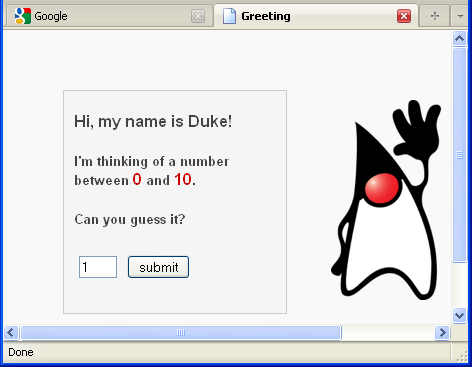
button, or press F6; fn-F6 on Mac). When the welcome page displays in the browser, enter a number and click
submit.
)
button, or press F6; fn-F6 on Mac). When the welcome page displays in the browser, enter a number and click
submit.

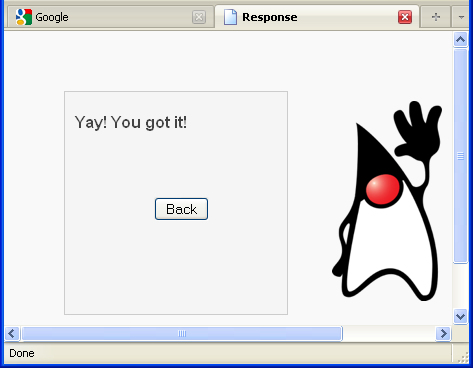
You see the response.xhtml page display similar to the following (provided you did not guess the correct number).

Two things are wrong with the current status of the response page:
- The html <p> tags are displaying in the response message.
- The Back button is not displaying at the correct location. (Compare it to the original version.)
The following two steps correct these points, respectively.
Set the <h:outputText> tag's escape attribute to false. Place your cursor between outputText and value, insert a space by pressing Ctrl-Space to invoke code-completion. Scroll down to choose the escape attribute and you can inspect the documentation at the same time.

As indicated by the documentation, the escape value is set to true by default. This means that any characters that would normally be parsed as html are included in the string, as shown above. Setting the value to false enables any characters that can be parsed as html to be rendered as such.
Click Enter, then type false as the value.
<h4><h:outputText escape="false" value="#{UserNumberBean.response}"/></h4>

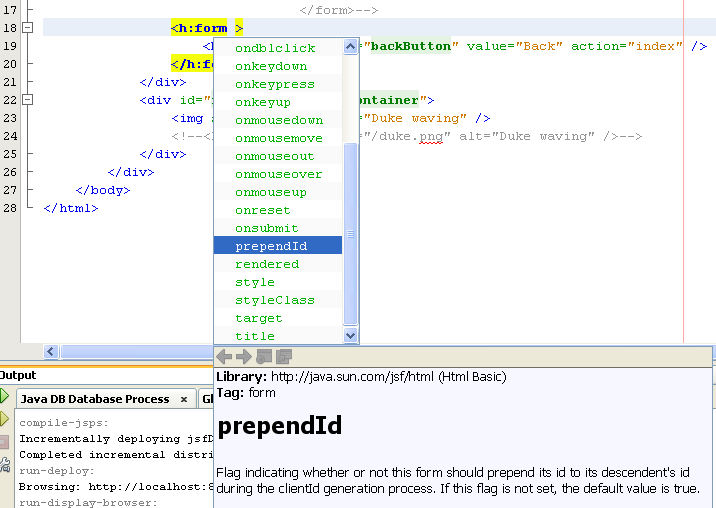
Set the <h:form> tag's prependId attribute to false. Place your cursor just after 'm' in <h:form> and insert a space, then press Ctrl-Space to invoke code-completion. Scroll down to choose the prependId attribute and inspect the documentation. Then click Enter, and type false as the value.
<h:form prependId="false">
----------------------------------------------------------------------

JSF applies internal id's to keep track of UI components. In the current example, if you inspect the source code of the rendered page, you will see something like the following:
<form id="j_idt5" name="j_idt5" method="post" action="/jsfDemo/faces/response.xhtml"enctype="application/x-www-form-urlencoded"><input type="hidden" name="j_idt5" value="j_idt5" /><input id="j_idt5:backButton" type="submit" name="j_idt5:backButton" value="Back" /><input type="hidden" name="javax.faces.ViewState" id="javax.faces.ViewState"value="7464469350430442643:-8628336969383888926" autocomplete="off" /></form>
The id for the form element is j_idt5, and this id is prepended to the id for the Back button included in the form (shown in bold above). Because the Back button relies on the #backButton style rule (defined in stylesheet.css), this rule becomes obstructed when the JSF id is prepended. This can be avoided by setting prependId to false.
Run the project again (click the
Run Project (
![]() )
button, or press F6; fn-F6 on Mac). Enter a number in the welcome page, then click
submit.
)
button, or press F6; fn-F6 on Mac). Enter a number in the welcome page, then click
submit.

The response page now displays the response message without the <p> tags, and the Back button is positioned correctly.
Click the Back button. Because the current value of UserNumberBean's userNumber property is bound to the JSF inputText component, the number you previously entered is now displayed in the text field.


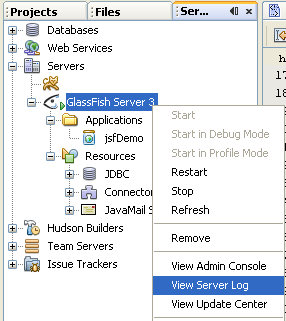
Inspect the server log in the IDE's Output window (Ctrl-4; ⌘-4 on Mac) to determine what the correct guess number is.
If you can't see the server log for any reason, you can open it by switching to the Services window (Ctrl-5; ⌘-5 on Mac) and expanding the Servers node. Then right-click the GlassFish server on which the project is deployed and choose View Server Log.

Type in the correct number and click submit. The application compares your input with the currently saved number and displays the appropriate message.
Click the Back button again. Notice that the previously entered number is no longer displayed in the text field. Recall that UserNumberBean's getResponse() method invalidates the current user session upon guessing the correct number.
Every time we hit the Back button when the guess was correct, Duke gedik will think a new number as can be seen in the GlassFish server’s log.
