<Visual Web JSP & JSF Application 2 |Main Java & Gang |NetBeans & Visual Web JSF >
Getting Started with Visual Web JSF Application Development Part 3
This is the final part for the Visual Web JSF project.
Storing and Passing Data
You use the Application Bean, the Session Bean, and the Request Bean to store information for use by other pages.
To add a property to the Session Bean:
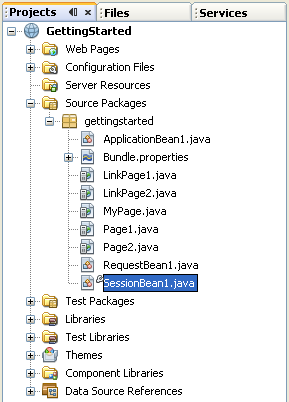
1. Double-click the SessionBean1 node in the Navigator window. This opens SessionBean1.java in the Java Editor.
|

Or through the Project window.
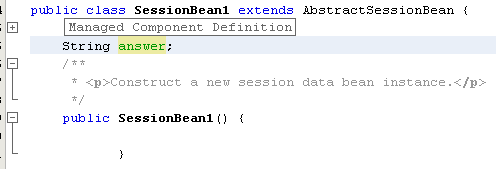
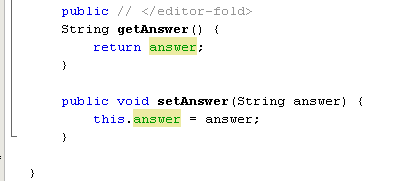
2. Add the answer property of type String to the constructor public class SessionBean1 extends AbstractSessionBean.
3. Fix the imports if necessary.
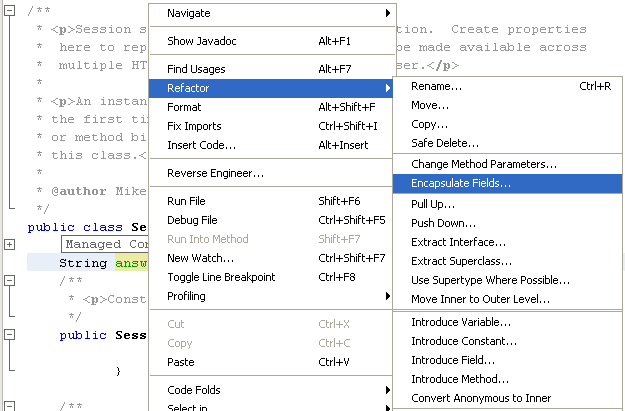
4. Right-click in the editor and choose Refactor > Encapsulate Fields. In the resulting dialog, create the getter method if the property is Read Only and both the getter and setter methods if the property is Read/Write.
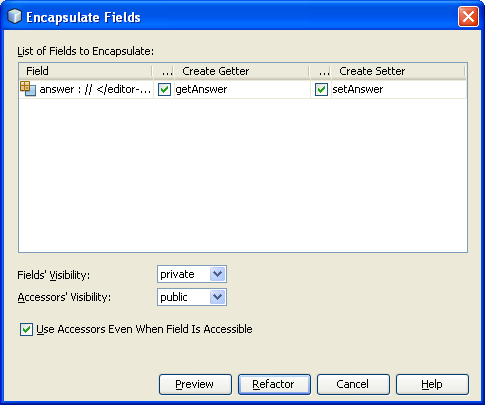
Click the Refactor button. At the end of the file we can see the setter and getter.
The property appears as a subnode under SessionBean1 in the Navigator window, but usually not right away.
Use similar steps to add a property to the Request Bean or the Application Bean. For more information see the FAQ (http://wiki.netbeans.org/VwpFAQManagedBeans) How do I add properties to managed beans in NetBeans IDE 6.0?
Note: You can also add properties to a page bean (the backing bean that the IDE creates for each page). To add a property to a page bean, open the page's java code and add the property declaration to the constructor public class Page1 extends AbstractPageBean, and encapsulate the fields as above. Page bean property values last only as long as the page bean is instantiated. For example, when the user clicks a Button component that re-renders the page (that is, the action method returns null), a new instance of that page bean is created, and the page bean's property values are reinitialized. If you want to pass a value to the postback, you can use Hidden Field components.
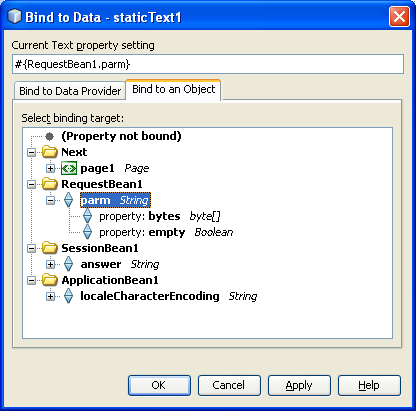
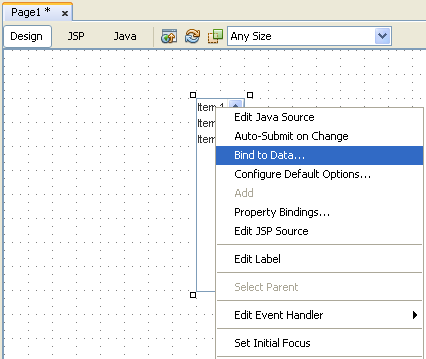
To associate a component with a bean's property, right-click the component and choose Bind to Data. In the Bind to Data dialog box, select the Bind to Object tab and choose the bean's property, as shown in the following figure.


Note: For most components, the pop-up menu provides two binding actions - Property Bindings and Bind to Data. The Property Bindings dialog box enables you to bind any of the component's properties to a managed bean property or a data provider field. The Bind to Data dialog box is a shortcut for binding the component's value-holding property to a managed bean property or a data provider field. Use the Bind to Data Provider tab to bind to any data provider that you have added to the page or a managed bean. Use the Bind to an Object tab to bind to a page property or a managed bean property.
Storing and Passing Data: Try It
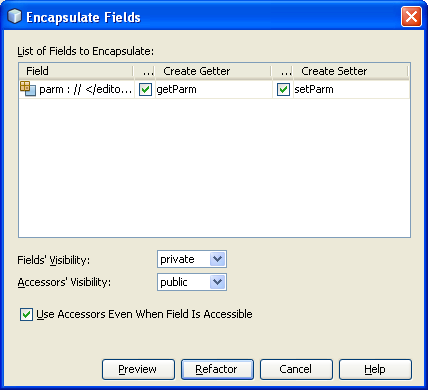
Add a property to RequestBean1.java: Name the property parm, make it a String and allow users read/write access.


Click the Refactor button.
Note that the newly added property might not appear in the Navigator window. To make the property appear, right-click in the Visual Designer and choose Refresh from the pop-up menu. You can also open and save the RequestBean1 source file to make the property appear, as you do in the following steps.
Close and save the file.
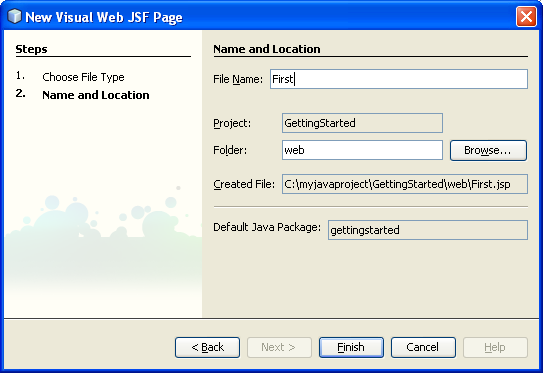
Create a page named First with a Button component and a Text Field component.
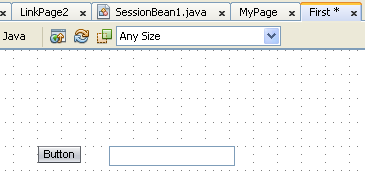
Right-click the Text Field component and choose Bind to Data from the pop-up menu. Click the Bind to an Object tab, select RequestBean1 > parm, and click OK.


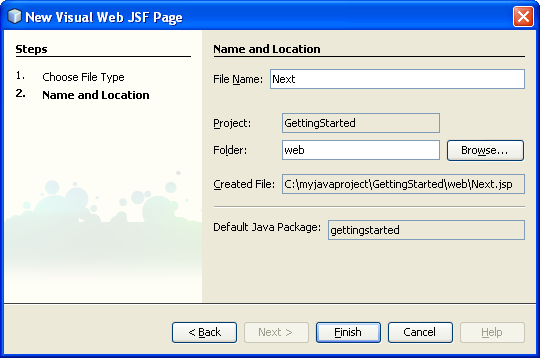
Create a page named Next. Add a Button component and add a Static Text component.

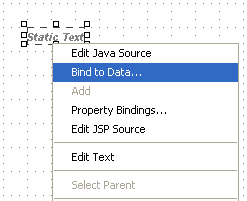
Bind the Static Text component on the Next page to RequestBean1 > parm using the same steps that you used for the Text Field component on the First page.
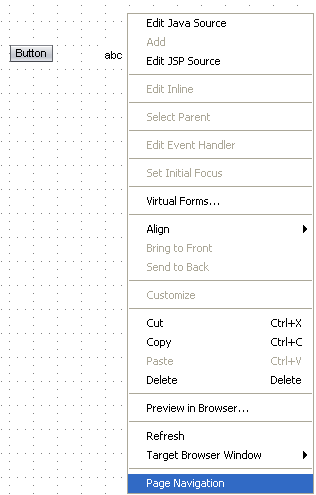
Right-click the page background and choose Page Navigation from the pop-up menu.
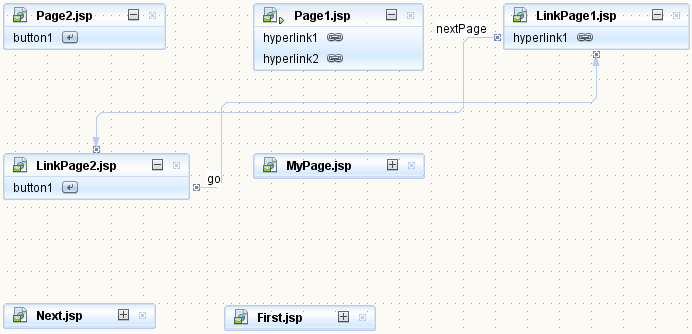
In the Page Flow editor, create a connector from the Button component on the First page to the Next page and name it testbean. Leave the Button component on the Next page alone, because you want this button to cause the Next page to simply re-render itself.


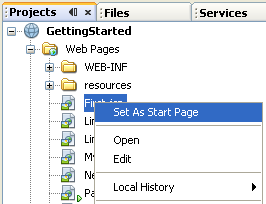
Set First.jsp as the start page and run the application.
Enter a value and click the button.
|
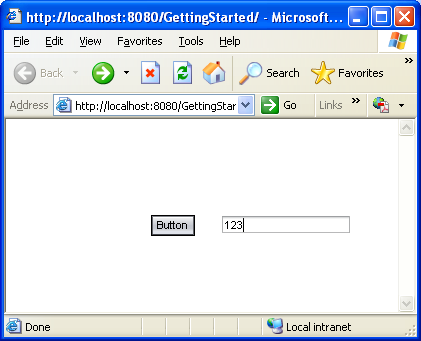
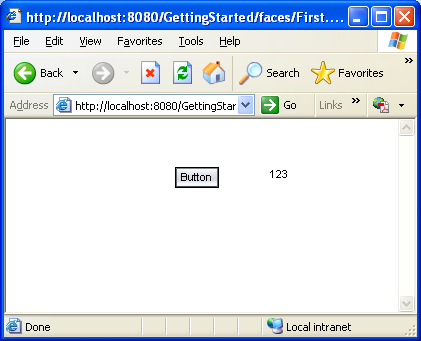
Note that the Next page displays the value that you entered on the First page. Behind the scenes, an instance of RequestBean1 was instantiated to store the Text Field component's value in the parm property. The value of that parm property was subsequently retrieved for the response (the HTML for the Next page). Once the response was rendered, the RequestBean1 instance was destroyed.
Click the button that is on the Next page to cause the Next page to re-render itself.
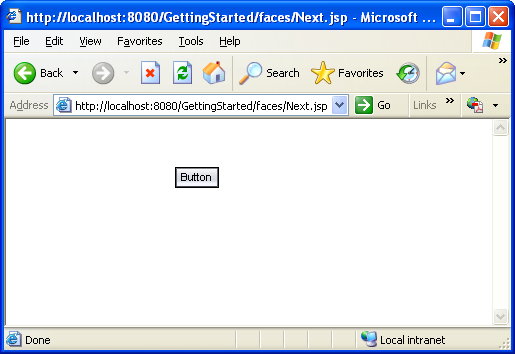
Notice how the Static Text component no longer shows a value. This is because the RequestBean1 instance that held the value only lived as long as the request that began when the First page was submitted and that ended when the HTML for the Next page was sent back to the client.
For More Information
Connecting to Databases
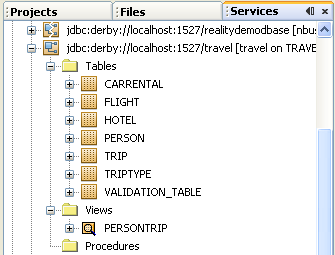
The Services window includes a Databases node, which shows all the databases that are registered with the IDE, as shown in the following figure. NetBeans IDE 6.0 provides a sample TRAVEL database which you use in the remainder of this tutorial.

Before you can access a database from a project, you must first connect the IDE to the database. You must do this every time you start the IDE and open a project that is connected to the database.
If a database's badge appears broken![]() and you cannot expand the database's node, the IDE is not connected to the database. To connect to the TRAVEL database, right-click the database's node in the Services window and choose Connect from the pop-up menu.
and you cannot expand the database's node, the IDE is not connected to the database. To connect to the TRAVEL database, right-click the database's node in the Services window and choose Connect from the pop-up menu.

If the Connect dialog box appears, enter travel for the Password and select Remember Password During This Session.
When you open an existing project, the Visual Designer might show an error screen. Typically, this is because the Visual Designer needs to get information from the database, but the IDE is not connected to the database. Try connecting to the database server and clicking the Continue button in the error screen to resolve the problem.
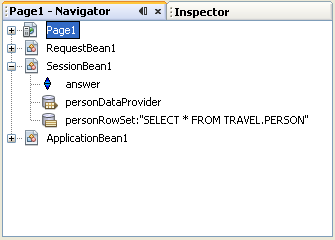
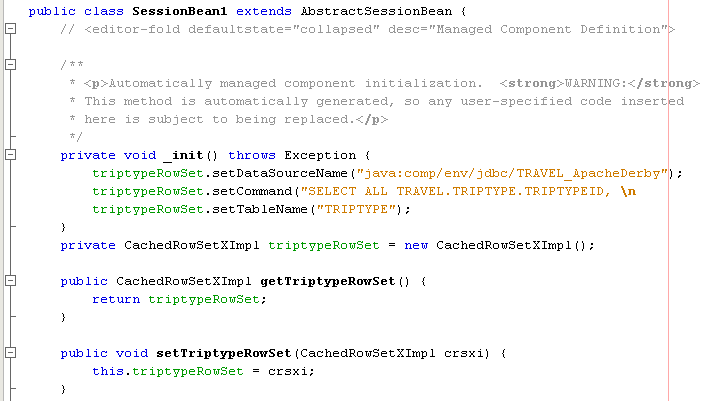
You can connect a page to a database table by dragging the table from the data sources section and either dropping it on a component or dropping it on the page. When you do this, the IDE adds a data provider to the page and a rowset to the SessionBean1 class, as shown in the following figure.
The rowset object makes the connection to the database, executes the queries, and manages the result set. The data provider object provides a common interface for accessing many types of composite data, from database tables, to ArrayList objects, to Enterprise JavaBeans objects. Typically, the only time that you work with the rowset object is when you need to set query parameters. In most cases, you use the data provider object to access and manipulate the data.
Once you have added a data provider to a project, you can bind a component to the data provider by right-clicking the component and choosing Bind to Data. In the Bind to Data dialog box, click the Bind to Data Provider tab to bring it to the front.

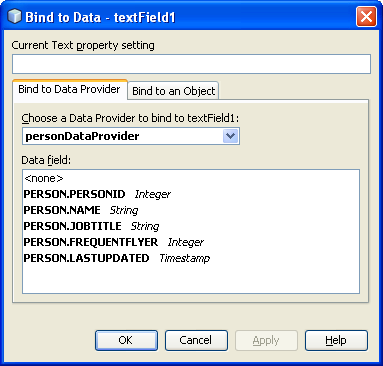
The Choose a Data Provider drop-down list shows all the project's data providers from which you can select the data provider to bind to the component. After you select the data provider, choose the appropriate data column to be bound to the component. For some components, such as the Drop Down List component, you must choose both a Value field and a Display field.
To define the SQL query to use to retrieve the data, you use the Query Editor, as shown in the following figure. You access this editor through a rowset object.

Connecting to Databases: Try It
1. We create a new web project for this exercise name it as WebData and drop a Listbox component onto the page.


2. In the Services window, expand Databases, expand the jdbc node for the TRAVEL database, and expand the Tables node.
3. Drag the TRIPTYPE node onto the page. Note: If the TRAVEL database's badge is broken and you cannot expand the database's node, the IDE is not connected to the database. To connect to the TRAVEL database, right-click the databases node in the Services window and choose Connect from the pop-up menu. When the Connect dialog box appears, enter travel for the Password, select Remember Password During This Session, and click OK.
You can see it in the Navigator.

4. Right-click the Listbox component and choose Bind to Data from the pop-up menu.
5. In the Bind to Data dialog, click the Bind to Data Provider tab, and make sure that tripTypeDataProvider is selected in the Choose a Data Provider drop-down list.

6. Set the Value Field to TRIPTYPE.TRIPTYPEID (the default selection) and set the Display Field to TRIPTYPE.DESCRIPTION. Click OK.

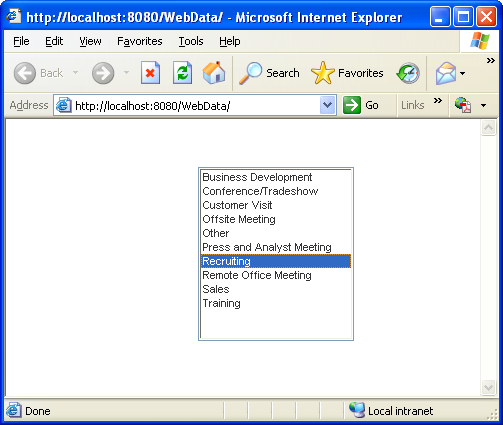
7. Run the application to see how the listbox is filled with data from the table.

8. Expand SessionBean1 in the Navigator window and double-click the triptypeRowSet node to open its Query Editor.

In the DESCRIPTION row of the grid panel, click the field in the Sort Type column and then choose Ascending from the drop-down list.
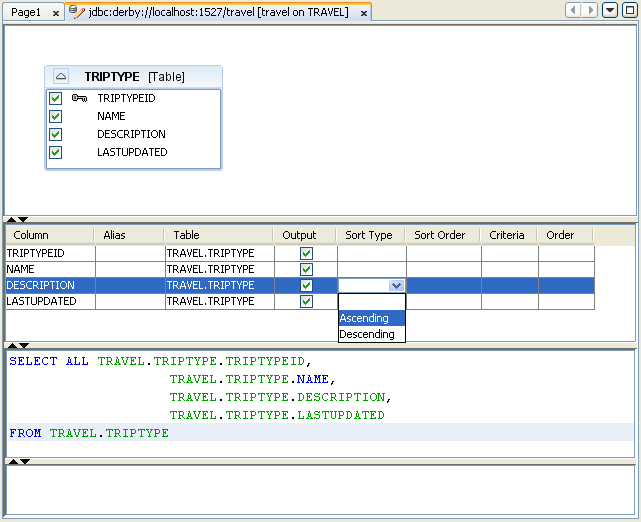
9. Click the X in the Query Editor's tab, labeled something like jdbc:derby://localhost:1527/travel to close the Query Editor, and run the program again. Note how the items now appear in alphabetical order.
![]()
10.(Optional) Look in the _init() method in the page's Java source code to see the code for associating the data provider with the rowset. This method is folded by default. To unfold the code, click the code fold box that appears next to the left margin.
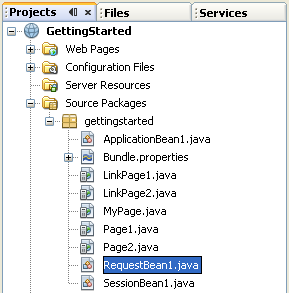
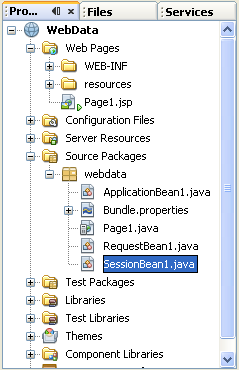
Double-click the Source Packages > webdata > SessionBean1 node in the Projects window to open the Java source code for the session bean. Look in the session bean's _init() method to see how the rowset code implements the query.
For More Information
From the main menu, choose Help > Help Contents to open the Help viewer, and then in the Contents pane expand Web Applications > Creating Web Applications > Binding Components to Data and read the topics under this section.
Debugging a Web Application
The IDE has a built-in debugger to help you troubleshoot your programs, as shown in the following figure. You can use it to set breaks and watches, to step through code, and to run until it reaches the code statement that the cursor is on.
------------------------------------------------------------------------------------------------------------------

You set a breakpoint by clicking in the left margin of the Java Editor. You set a watch by right-clicking a variable or expression choosing New Watch. To run the debugger, choose either Run > Debug Main Project or Run > Run to Cursor from the main menu.
Tip: Here are some other features that you can use to diagnose and resolve problems:
Use the HTTP Monitor to monitor the client-server communication and to replay HTTP requests. The ability to replay requests can be helpful when your page has several input fields and you want to re-create the HTTP request without having to fill in all the fields.
Add a Message Group component to the page and use the error, warn, fatal, and info methods to display diagnostic messages in the component.
Use the log method to send diagnostic messages to the server log.
Debugging a Web Application: Try It
Create, or reuse, a start page. Add a Static Text component, set its text property to Hello, and set its id property to helloText.

Add a Button component. Double-click the Button component to access its action method (button1_action) and replace the method's body with the following code.

Code Sample 1: button1_action Method |
String oldString = (String) this.helloText.getText(); this.helloText.setText("Good Bye"); String newString = (String) this.helloText.getText(); return null; |

You can press Alt-Shift-F to reformat the code you just added.
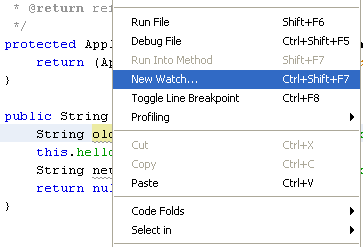
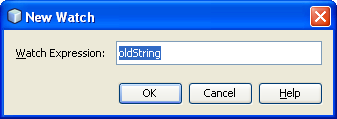
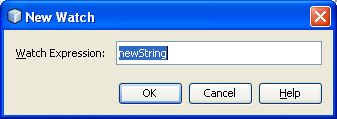
3. Right-click oldString, choose New Watch, and click OK. Do the same for newString.
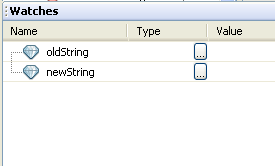
4. You see a Watches tab window open at the bottom of the IDE, and each expression to be watched is listed in the window.
5. Click in the left margin to set a breakpoint for the first statement in the method's body.
6. You see a pink box appear where you clicked, and the entire line of code gets a pink background.

7. Choose Run > Debug Main Project from the main menu.

8. When the page displays in the Web Browser, click the button. When the debugger breaks in the button1_action method, click the Watches tab in the Debugger window to see the current value of newString and oldString.


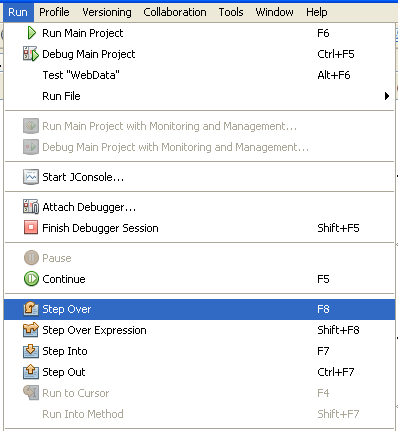
9. Choose Run > Step Over from the main menu or click the Step Over button![]() in the toolbar. Look in the Watches tab. Step over the code two more times and observe the Value column in the Watches tab.
in the toolbar. Look in the Watches tab. Step over the code two more times and observe the Value column in the Watches tab.


10.Explore the Local Variables and Call Stack tabs.


11.Choose Run > Finish Debugger Session to close the debugger session.

For More Information
From the main menu, choose Help > Help Contents to open the help viewer, and then in the Contents pane expand Java Applications > Debugging Applications and read the topics on debugging.
From the main menu, choose Help > Help Contents to open the help viewer, and then in the Contents pane choose IDE Basics > Servers and Databases > HTTP Monitor > About the HTTP Monitor.
Summary
You start building a web application by creating a Visual Web JSF Application project.
You add pages by right-clicking the Web Pages node in the Projects window and choosing New> Visual Web JSF Page.
To design a page, drag components from the Palette onto the page in the Visual Designer.
Click the Run Main Project button (
 ) in the main toolbar to save, build, deploy, and run the application.
Use the Page Flow editor to specify page navigation. You can also add link components to a page and set their url property values.
Drop Validator and Converter objects onto a component to specify formatting and validation rules.
Use Message components and the Message Group component to display runtime error messages.
Use properties in the RequestBean1, SessionBean1, and ApplicationBean1 classes to store and pass values from page to page.
To create a data provider object and its associated rowset for a database table, drag a table from the Databases section of the Services window onto the page or onto one of its components.
Use the Bind to Data menu action to bind components to data provider fields, and to bind components to bean properties.
Open a Query Editor on a rowset to modify the SQL query that is used to fill the rowset object.
Use the debugger, the HTTP Monitor, the server log, and the Message Group component to diagnose runtime problems.