Using Hibernate
in a Java Swing Application 1
|
|
The original version of this tutorial can be found at Java SE, hibernate and swing application example. This is a refined and working version.
In this tutorial, you use the NetBeans IDE to create and deploy a Java Swing application that displays data from a database. The application uses the Hibernate framework as the persistence layer to retrieve POJOs (plain old Java objects) from a relational database. Hibernate is framework that provides tools for object relational mapping (ORM). The tutorial demonstrates the support for the Hibernate framework included in the IDE and how to use wizards to create the necessary Hibernate files. After creating the Java objects and configuring the application to use Hibernate, you create a GUI interface for searching and displaying the data. The application that you build in this tutorial is a companion administration application for the DVD Store web application. This tutorial covers how to create an application that allows you to query an actor's profile based on the match with first name or last name. If you wish you can extend the application to query film details and to add/update/delete items. This tutorial uses MySQL and the Sakila database, but you can use any supported database server with Hibernate applications. The Sakila database is a sample database that you can download from the MySQL site. Information for setting up the Sakila DB is provided in the following sections. Before starting this tutorial you may want to familiarize yourself with the hibernate documentation that can be found at hibernate.org (http://hibernate.org/).
Contents:
|
To follow this tutorial, you need the following software and resources.
|
Software or Resource |
Version Required |
|
6,9 and Java |
|
|
version 6 or version 5 |
|
|
version 5.x |
|
|
Sakila Database |
plugin available from update center |
Note. NetBeans IDE 6.9 requires Java Development Kit (JDK) 6. You can download a zip archive of the finished project.
Creating the Database
This tutorial uses a MySQL database called sakila. The sample database is not included when you install the NetBeans IDE so you need to first create the database to follow this tutorial.
The Sakila database is a free sample MySQL database that is available from the MySQL site. To create the sakila database you can download and install the Sakila Sample Database plugin using the Plugins manager.
Open the Plugins manager and install the Sakila Sample Database plugin.
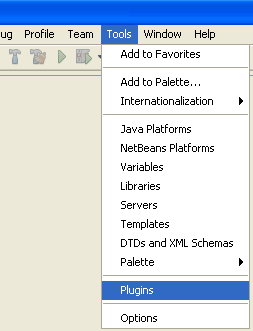
Select Tools > Plugins
If there are any updates, the list should be visible in the Updates page. Click the Available Plugins page.

If sakila database is not installed yet, it should be visible in the Available Plugins page. In this case select the tick box next to Sakila Sample Database and click the Install button at the bottom-left. If sakila database already installed, then it should not visible in the Available Plugins. You can also refer the steps to install sakila database at Javaguicodexample.com.

After you install the plugin you can create the sakila database from the Services window. The sakila database is added to the list of databases in the Create MySQL database dialog box.
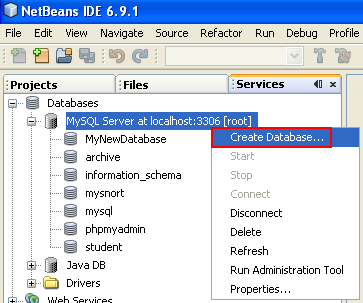
After installing the plugin, start the MySQL database server by expanding the Databases node in the Services window, right-clicking the MySQL Server node and choosing Start.

Select and right-click the MySQL Server node and choose Create Database menu.
Select the sakila database from the New Database Name drop down list in the Create MySQL Database dialog box.
--------------------------------------------------------------------------------


De-select the Grant Full Access To:. We will use MySQL root user instead (however, this is not recommended). If you have created a dedicated MySQL database user with appropriate permissions, you may want to use it and this is the recommended steps for security reasons.
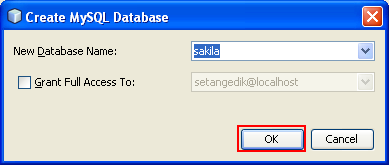
Click OK.
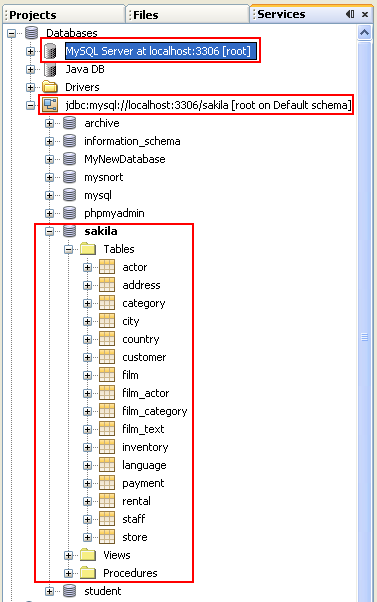
When you click OK, a Sakila database node appears under the MySQL Server node.
Select and right-clicking the sakila node and choose Connect.

When you click Connect, a database connection node for the sakila database (jdbc:mysql://localhost:3306/sakila [username on Default schema]) is listed under the databases connection string node. When a connection is open you can view the data (if any) in the database by expanding the sakila database > Tables > any_table node.
To view the data, select one of the table > right-clicking mouse > select View Data context menu.
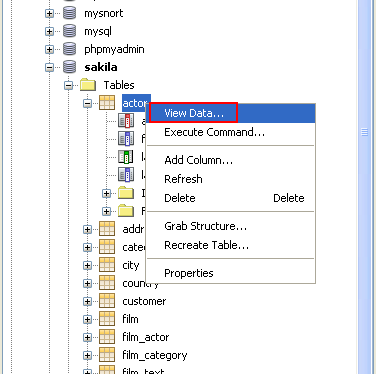
The data in the table should be visible now.

The database and those tables can also be viewed or verified by using the MySQL command line client. The following screenshot shows the available databases that have been created in MySQL using show databases; command..

The following screenshot shows the tables in sakila database by running show tables; MySQL command.

< Java and NetBeans Tutorial | Java Swing and Hibernate 2 >