<A Complete Java Desktop GUI & MySQL Database App 1 |Java & Friends Activities |A Complete Java Desktop GUI & MySQL Database App 3 >
MySQL Database and Java Desktop GUI Part 2
Contents:
-
Pre requirement
-
Some Notes on Java GUI from the Plain Old Java Code View
-
Java GUI: Components and Containers
-
Frames and Panels
-
Customizing the Java GUI
-
Customizing the Table Layout
Pre requirement: NetBeans 6.x.x, MySQL 5.x.x andalready completed Tutorial 1.
In this tutorial we will continue customizing our Java desktop GUI and MySQL database project. The original tutorial can be found atnetbeans.org. All credits must go to the original authors.
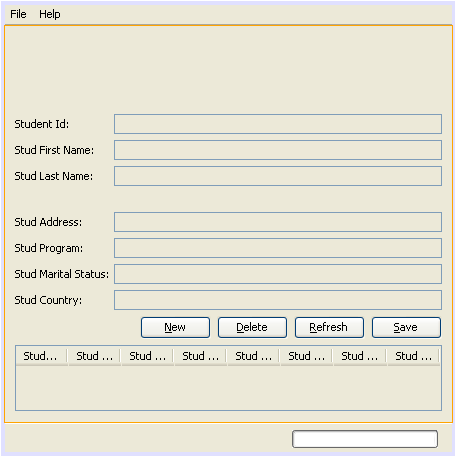
The following is the Java desktop GUI from the previous tutorial and we faced a problem regarding the Stud Date Of Birth that was not properly displayed, only the day was displayed. We will resolve this later.

Some Notes on Java GUI from the Plain Old Java Code View
Java GUI: Components And Containers
Other than command-line applications which interact with the user only through simple text prompts, Java application can have graphical components as well. You should be familiar with the graphics and images displayed inside web pages that use Java applets. Java applets are a Java program that is intended to be embedded in a web page and executed through a browser. Java also has capabilities to create programs with graphical user interfaces (GUIs). A GUI component is an object that represents a screen element that is used to display information or to allow the user to interact with the program in a certain way. GUI components include labels, buttons, text fields, scroll bars, menus and many more. Java components and other GUI-related classes are defined primarily in two packages: java.awt and javax.swing. The Abstract Windowing Toolkit (AWT) was the original Java GUI package. It still contains many important classes such as the Color class. The swing package was added later and provides components that are more versatile than those of the AWT package. Both packages are needed for GUI development, but we should use Swing components whenever there is an option. A container is a special type of component that is used to hold and organize other components. Frames and panels are two examples of Java containers.
Frames and Panels
A frame is a container that is used to display GUI-based Java applications. A frame is displayed as a separate window with its own title bar. It can be repositioned on the screen and resized as needed by dragging it with the mouse. It contains a standard small buttons in the corner of the frame that allow the frame to be minimized, maximized and closed. A frame is defined by the JFrame class. A panel is also a container. However, unlike a frame, it cannot be displayed on its own. A panel must be added to another container for it to be displayed. Generally a panel doesn’t move unless you move the container that it is in. Its primary role is to help organize the other components in a GUI. A panel is defined by the JPanel class. We can classify containers as either heavyweight or lightweight. A heavyweight container is one that is managed by the underlying operating system on which the program is run, whereas a lightweight container is managed by the Java program itself. Occasionally this distinction will be important when we explore GUI development. A frame is a heavyweight component and a panel is a lightweight component. Heavyweight components are complex that lightweight components in general. A frame, for example has multiple panes, which are responsible for various characteristics of the frame window. All visible elements of a Java interface are displayed in a frame’s content pane. |
Generally, we can create a Java GUI-based application by creating a frame in which the program interface is displayed. The interface is often organized onto a primary panel which is added to the frame’s content pane. The components in the primary panel are often organized using other panels as needed.
Containers are generally not useful unless they help us organized and display other components. For example, a label is a component that displays a line of text in a GUI. A label can also display an image as well. Usually, labels are used to display information or identify other components in the GUI. Labels can be found in almost every GUI-based program. The following program example tries to demonstrate the basic use of frames, panels and labels.
import java.awt.*;
import javax.swing.*;
public class Framepanellabel
{
public static void main(String[] args)
{
JFrame frame = new JFrame ("Java GUI Components");
frame.setDefaultCloseOperation(JFrame.EXIT_ON_CLOSE);
JPanel primary = new JPanel();
primary.setBackground (Color.yellow);
primary.setPreferredSize(new Dimension(250,75));
JLabel label1 = new JLabel("Java GUI components, ");
JLabel label2 = new JLabel ("Frame, panel and label.");
primary.add(label1);
primary.add(label2);
frame.getContentPane().add(primary);
frame.pack();
frame.setVisible(true);
}
}
A sample output:
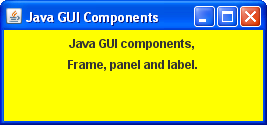
When this program is executed, a new window appears on the screen displaying a phrase. The text of the phrase is displayed using two label components. The labels are organized in a panel and the panel is displayed in the content pane of the frame.
The JFrame constructor takes a string as a parameter, which it displays in the title bar of the frame. The call to the setDefaultCloseOperation() method determines what will happen when the close button (X) in the top-right corner is clicked. In most cases we will simply let that button terminate the program, as indicated by the EXIT_ON_CLOSE constant.
A panel is created by instantiating the JPanel class. The background color of the panel is set using the setBackground() method. The setPreferredSize() method accepts a dimension object as a parameter, which is used to indicate the width and height of the component in pixels. The size of many components can be set this way and most components also have setMinimumSize() and setMaximumSize() methods to help control the look of the interface.
The labels are created by instantiating the Jlabel class, passing to its constructor the text of the label. In this program two separate label components are created.
Containers have an add() method that allows other components to be added to them. Both labels are added to the primary panel and from that point on considered to be part of that panel. The order in which components are added to a container often matters. In this case, it determines which label appears above the other.
Finally, the content pane of the frame is obtained using the getContentPane() method, immediately after which the add method of the content pane is called to add the panel. The pack method of the frame sets its size appropriately based on its contents; in this case the frame is sized to accommodate the size of the panel it contains. This is a better approach than trying to set the size of the frame explicitly, which should change as the components within the frame change. The call to the setVisible() method causes the frame to be displayed on the monitor screen.
Let forget the Java old plain code in building the Java GUI. Let continue our task using NetBeans, the Java IDE that automate most of the works that previously need to be done manually. For our project, the following is the MainPanel container that together with other containers fitted in the main Frame.
The following is the MenuBar container.

The following is the StatusPanel container.

Customizing the Java GUI
1. Next we would try to customize GUI components in our project. Firstly, we re-position the table at the bottom of the frame by click-drag and drop.
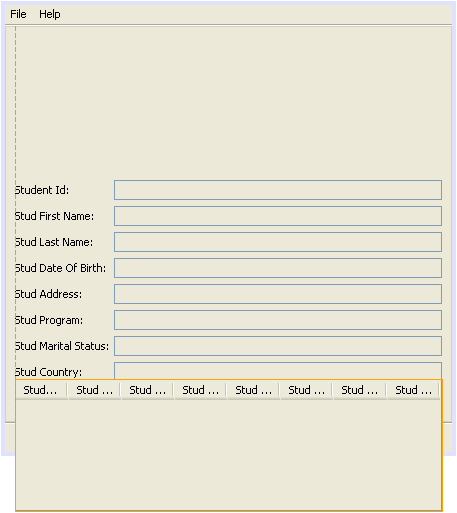
2. Next, delete the Date of birth label and its text field. We will customize this component later. Select the Date of Birth component > right click mouse > select Delete context menu.

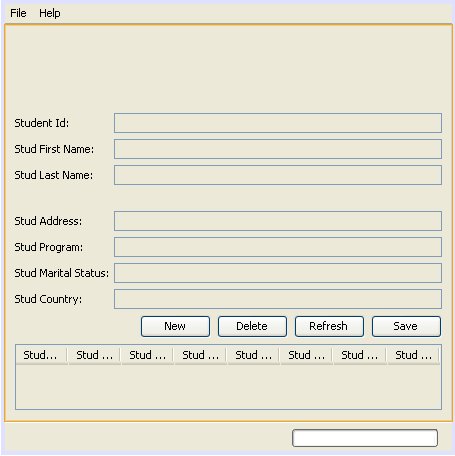
3. Then re-arrange other controls. We re-position the buttons at the top. Click-hold-drag and drop those buttons.
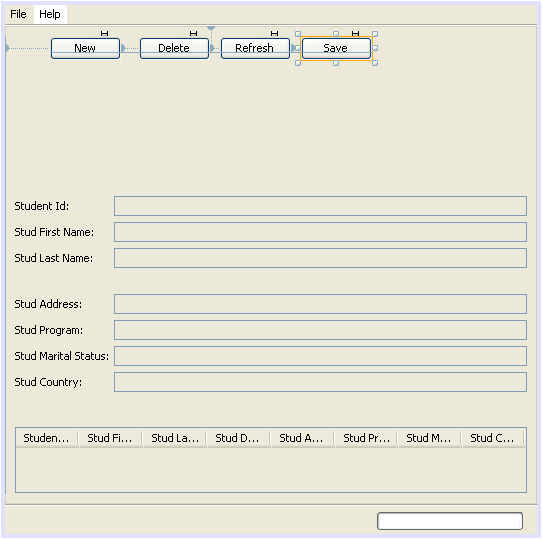
4. Re-position all the components by dragging and dropping.
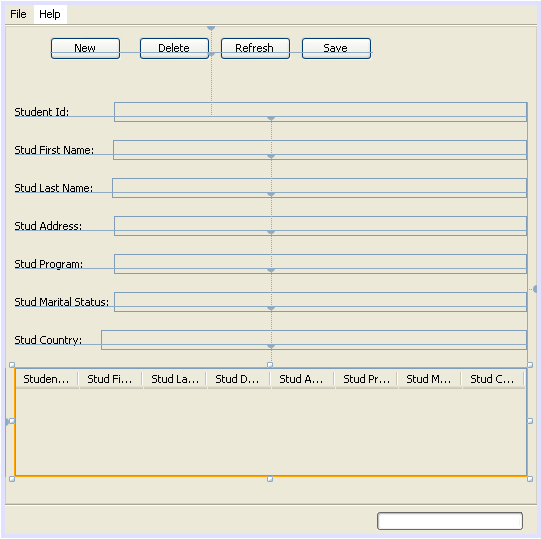
5. Next we resize the text fields. This is a drag and resize task.

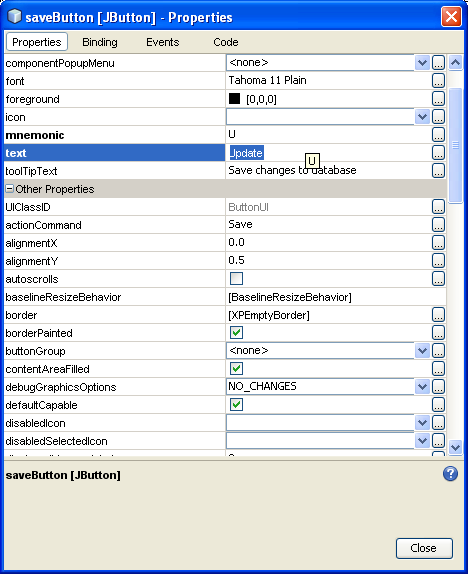
6. Next, we change the Save button text to Update. Select the Save button > right click mouse > select Properties context menu.

7. In the text property, change to Update and change also the mnemonic property to U.
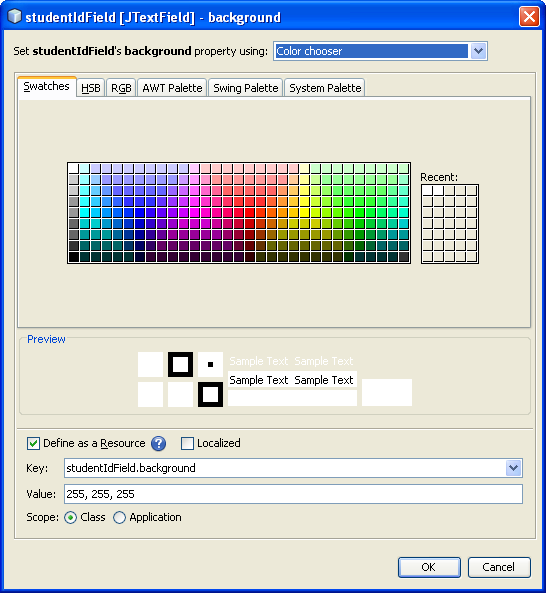
8. Next we change the background for the text fields to white. Select the text field > go to Properties page > click the ellipses at the end of the background property.
 |
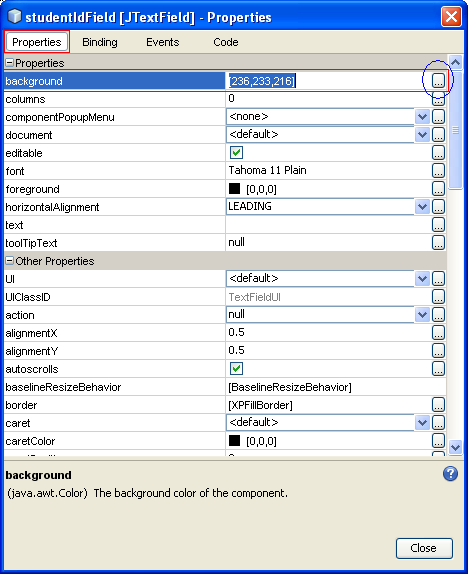
9. Select the Swatches tab and select the white color. Click OK.
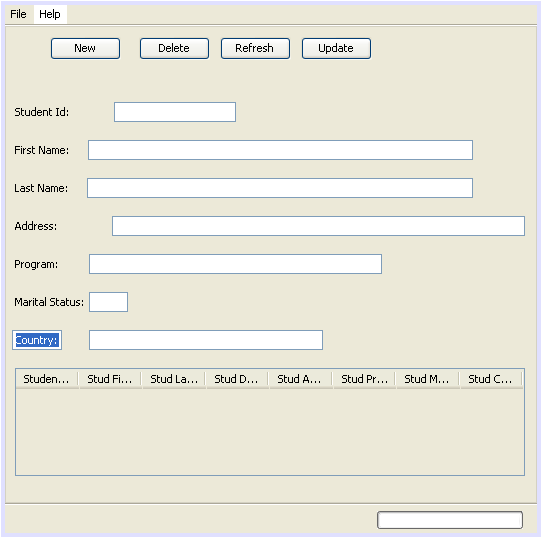
10.The following Figure shows our current Java GUI.

11.Next we edit the labels by removing the Stud word for all labels except Student Id. Click the label, wait for a while, click again and edit.
Customizing the Table Layout
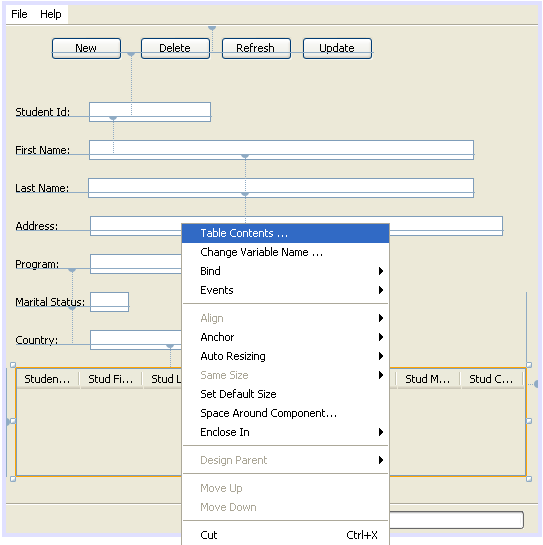
1. Next we also would like to remove the Stud word for the table column headers. Select the table panel > right click mouse > select Table Contents context menu.
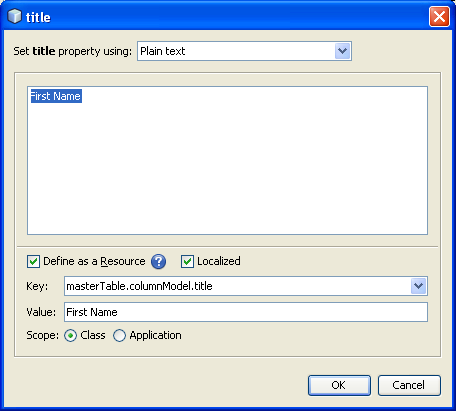
2. Select Columns tab > select the second row > click the ellipses at the end of the Title: text field.

3. In the text area removes the Stud, leaving the First Name. Don’t forget to remove the Define as a Resource tick and click OK. We faced some problems when selecting the Define as a Resource which the changes that have been set do not take effect. Repeat these steps for other remaining columns except the Student Id.
---------------------------------------------------------------------------------------------------------------
----------------------------------------------------------------------------------------------------------------

4. The following Figure shows our current Java GUI when built and run.
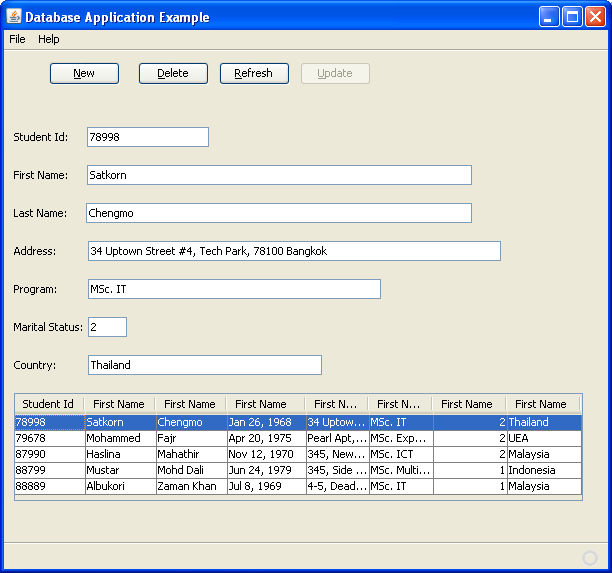
5. Next, we remove the table grid color to white, that means there is no grid in the table. Select the table > right click mouse > select Properties context menu.

6. In gridColor property, change the color to white. Click the ellipses to choose the white color.

7. Next, let re-build our Java desktop GUI application. As usual select the project node > right click mouse > select Build context menu.

8. Notice the progress in the Output window. Make sure there is no error.

9. Then, re-run the project. Select the project node > right click mouse > select Run context menu.
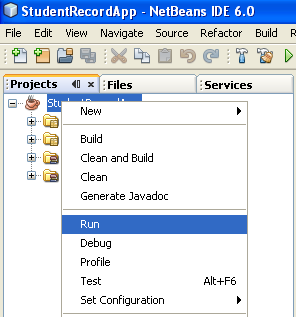
10.The following Figure show the Java GUI when in running mode. Then the table doesn’t have a grid anymore. Notice that all the table columns headers changed to First Name! You need to change back all the headers to their respective name as described in the previous steps. This is bug or what, we don’t know.

11.The following is the same data seen through the SQL query. It is confirm that the table column headers don’t changed as expected.

12.Continue to the next stage: Adding more functionalities and features