Introduction to the Struts Web Framework 1
Note: The original document can be found at: An Intro to Struts web framework & NetBeans. This is a refined version with details steps.
This document takes you through the basics of using NetBeans IDE to develop web applications using the Struts web framework. Struts is an open source framework that extends the Java Servlet API and employs a Model, View, Controller (MVC) architecture. It enables you to create maintainable, extensible, and flexible web applications based on standard technologies, such as JSP pages, JavaBeans, resource bundles, and XML.
This tutorial teaches you how to build a simple MVC application that displays a login page and returns a success page upon submitting data that passes validation. You learn several basic features provided by Struts, as well as how these features are implemented using the IDE. Specifically, you use Struts tags in JSP pages, maintain user data with a Struts ActionForm bean, and implement forwarding logic using a Struts Action object. You are also shown how to implement simple validation to your application, including setting up warning message for a failed login attempt.
For a more fine-grained introduction to Struts, see How does Struts work? On the official Struts website. Also, make use of the IDE's Javadoc Index Search (Help > Javadoc Index Search) to view the Struts Framework API, which is packaged with the Struts libraries.
Contents
-
Overview of the Application
-
Setting Up a Struts Application
-
Creating JSP Pages
Creating a Login Page
Creating a Success Page
-
Creating an ActionForm Bean
-
Creating an Action Class
-
Implementing Validation
Accessing Bean Data and Preparing a Forwarding Condition
Setting Up an Error Message
-
Adding forward Entries to struts-config.xml
-
Configuring and Running the Application
Setting the Welcome Page
Attaching a Stylesheet
Running the Application
To complete this tutorial, you need the following software and resources.
|
Software or Resource |
Version Required |
|
NetBeans IDE |
Java, version 6.8 |
|
Java Development Kit (JDK) |
version 5 or 6 |
|
GlassFish application server or Tomcat Servlet container |
v2 or v3 version 6.x |
Notes:
-
The Web and Java EE installation enables you to optionally install the GlassFish (v2 or v3) application server and the Apache Tomcat Servlet container 6.0.18. You must install one of these (or register a different server in the IDE) to work through this tutorial.
-
If you need to compare your project with a working solution download it here.
Overview of the Application
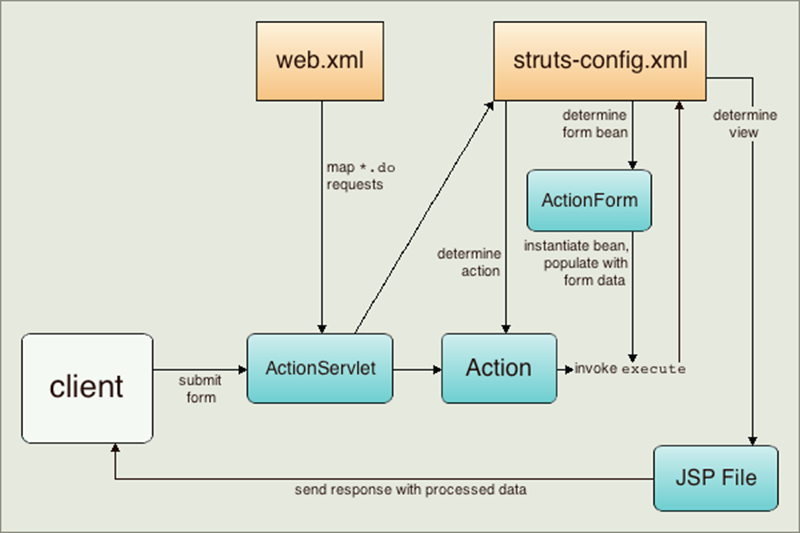
When you use Struts, the framework provides you with a controller servlet, ActionServlet, which is defined in the Struts libraries that are included in the IDE, and which is automatically registered in the web.xml deployment descriptor as shown below. The controller servlet uses a struts-config.xml file to map incoming requests to Struts Action objects, and instantiate any ActionForm objects associated with the action to temporarily store form data. The Action object processes requests using its execute method, while making use of any data stored in the form bean. Once the Action object processes a request, it stores any new data (i.e., in the form bean, or in a separate result bean), and forwards the results to the appropriate view.
Developing a Struts application is similar to developing any other kind of web application in NetBeans IDE. However, you complement your web development toolkit by taking advantage of the Struts support provided by the IDE. For example, you use templates in the IDE to create Struts Action objects and ActionForm beans. Upon creation, the IDE automatically registers these classes in the struts-config.xml file and lets you extend this file very easily using menu items in the Source Editor's right-click menu. Because many web applications use JSP pages for the view, Struts also provides custom tag libraries which facilitate interaction with HTML forms. Within the IDE's Source Editor, you can invoke code completion and Javadoc support that helps you to work efficiently with these libraries.
The following steps demonstrate how to create a simple form that collects user data, performs simple validation, and outputs the data on a success page.
Setting Up a Struts Application
In the IDE, a Struts application is nothing more than a normal web application accompanied by the Struts libraries and configuration files. You create a Struts application in the same way as you create any other web application in the IDE - using the New Web Application wizard, with the additional step of indicating that you want the Struts libraries and configuration files to be included in your application.
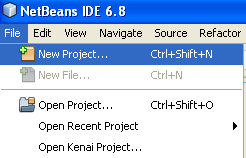
1. Choose File > New Project. Under Categories, select Java Web. Under Projects, select Web Application and click Next.

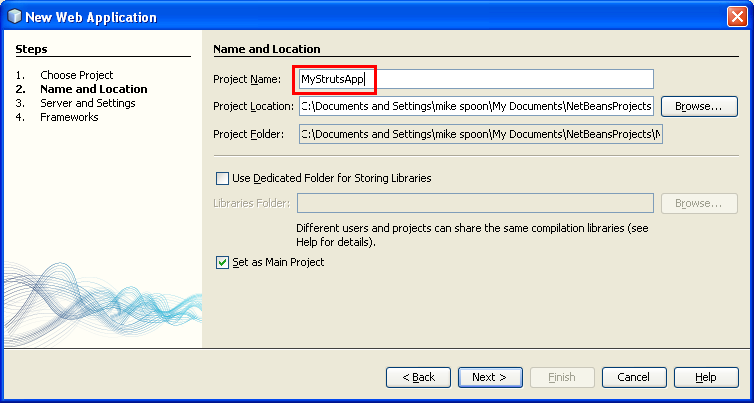
2. In the Name and Location panel, enter MyStrutsApp for Project Name and click Next. You may want to change the project location and folder if needed.
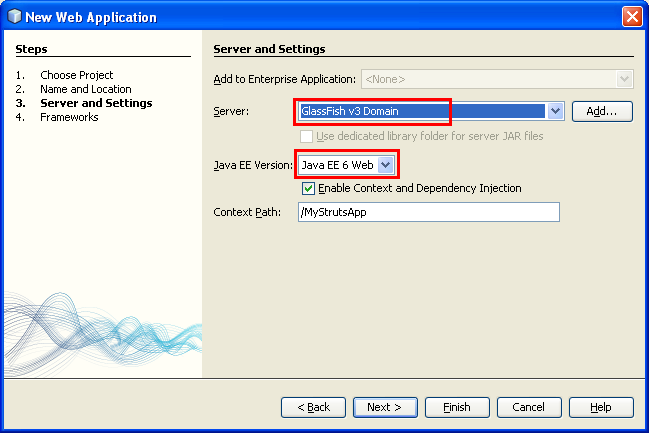
3. In the Server and Settings panel, select the server to which you want to deploy your application. Only servers that are registered with the IDE are listed. (To register a server, click Add next to the Server: drop-down list.) Also, note that the Context Path to your deployed application becomes /MyStrutsApp. Click Next.
4. In the Frameworks panel, select Struts (Struts 1.3.8 in this case).
----------------------------------------------------------
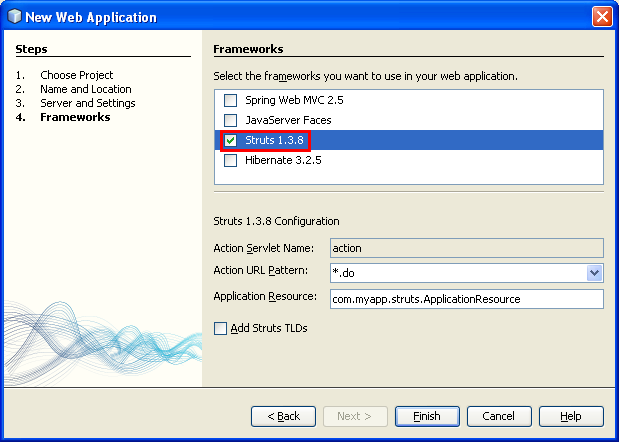
For purposes of this tutorial, do not change any of the configuration values in the lower region of this panel. These are the following:
-
Action Servlet Name: The name of the Struts action servlet used in the application. The web.xml deployment descriptor contains an entry for the action Servlet and specifies the appropriate Struts-specific parameters, such as the path to the servlet class within the Struts library and to the struts-config.xml configuration file within the application.
-
Action URL Pattern: Specifies the patterns of incoming requests which are mapped to the Struts action controller. This generates a mapping entry in the deployment descriptor. By default, only the *.do pattern is mapped.
-
Application Resource: Lets you specify the resource bundle which will be used in the struts-config.xml file for localizing messages. By default, this is com.myapp.struts.ApplicationResource.
-
Add Struts TLDs: Lets you generate tag library descriptors for the Struts tag libraries. A tag library descriptor is an XML document which contains additional information about the entire tag library as well as each individual tag. In general this is not necessary, because you can refer to on-line URIs rather than local TLD files.
5. Click Finish. The IDE creates the project folder in your file system. As with any web application in the IDE, the project folder contains all of your sources and the IDE's project metadata, such as the Ant build script. However, your web application in addition has all of the Struts libraries on its classpath. Not only are they on the application's classpath, but they are included in the project and will be packaged with it later when you build the project.

The project opens in the IDE. The Projects window is the main entry point to your project sources. It shows a logical view of important project contents. For example, if you expand several nodes within the new project, it may appear as follows:

Note: Use the Files window (Window > Files) to see all of your project contents in a directory-based view.

The Struts-specific configuration files, as well as the application's deployment descriptor, are conveniently placed within the WEB-INF folder. Open the deployment descriptor (double-click the web.xml file node to have it display in the Source Editor). In order to handle Struts processing, a mapping is provided for the Struts controller servlet:
<servlet>
<servlet-name>action</servlet-name>
<servlet-class>org.apache.struts.action.ActionServlet</servlet-class>
<init-param>
<param-name>config</param-name>
<param-value>/WEB-INF/struts-config.xml</param-value>
</init-param>
<init-param>
<param-name>debug</param-name>
<param-value>2</param-value>
</init-param>
<init-param>
<param-name>detail</param-name>
<param-value>2</param-value>
</init-param>
<load-on-startup>2</load-on-startup>
</servlet>
<servlet-mapping>
<servlet-name>action</servlet-name>
<url-pattern>*.do</url-pattern>
</servlet-mapping>

Above, the Struts controller servlet is named action and is defined in the Struts library (org.apache.struts.action.ActionServlet). It is set to handle all requests that satisfy the *.do mapping. In addition, initialization parameters for the servlet are specified by means of the struts-config.xml file, also contained in the WEB-INF folder.