Introduction to the Struts Web Framework 2
Creating JSP Pages
Begin by creating two JSP pages for the application. The first displays a form. The second is the view returned when login is successful.
-
Creating a Login Page
-
Creating a Success Page
Creating a Login Page
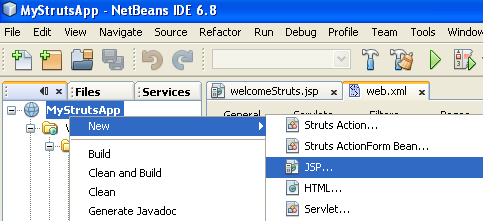
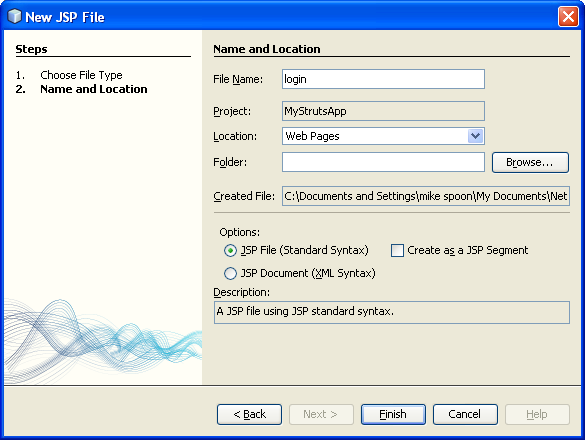
1. Right-click the MyStrutsApp project node, choose New > JSP, and name the new file login. Click Finish. The login.jsp file opens in the Source Editor.
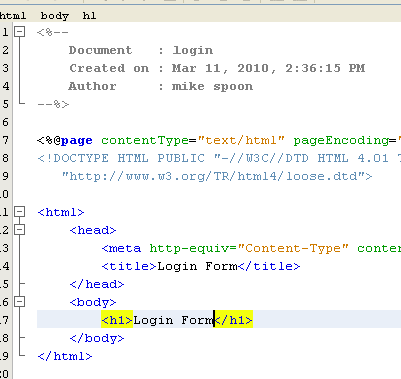
2. In the Source Editor, change the content of both the <title> and <h1> tags (or <h2> tags, depending on the IDE version you are using) to Login Form.
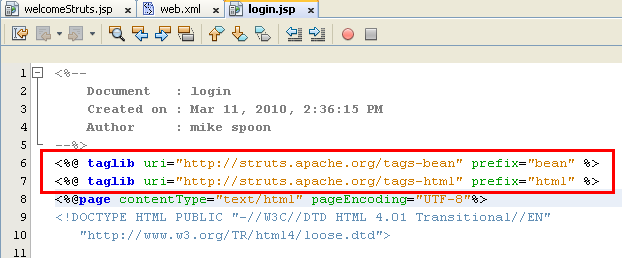
3. Add the following two taglib directives to the top of the file:
<%@ taglib uri="http://struts.apache.org/tags-bean" prefix="bean" %>
<%@ taglib uri="http://struts.apache.org/tags-html" prefix="html" %>
Many web applications use JSP pages for views in the MVC paradigm, so Struts provides custom tag libraries which facilitate interaction with HTML forms. These can be easily applied to a JSP file using the IDE's support for code completion. When you type in the Source Editor, the IDE provides you with code completion for Struts tags, as well as the Struts Javadoc. You can also invoke code completion manually by pressing Ctrl-Space:

The bean taglib provides you with numerous tags that are helpful when associating a form bean (i.e., an
ActionForm bean) with the data collected from the form. The html taglib offers an interface between the view and other components necessary to a web application. For example, below you replace common html
form tags with Struts'
<html:form>
tags. One benefit this provides is that it causes the server to locate or create a bean object that corresponds to the value provided for
html:form's
action element.
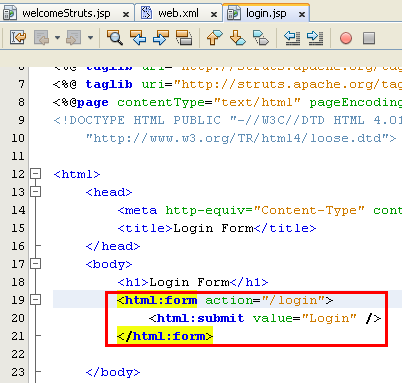
4. Below the <h1> (or <h2>) tags, add the following:
<html:form action="/login">
<html:submit value="Login" />
</html:form>
Whenever you finish typing in the Source Editor, you can tidy up the code by right-clicking and choosing Format (Alt-Shift-F).
-----------------------------------------------------

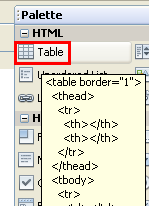
5. In the Palette (Window > Palette) in the right region of the IDE, drag a Table item from the HTML category to a point just above the <html:submit value="Login" /> line. The Insert Table dialog box displays. Set the rows to 3, columns to 2, and leave all other settings at 0. Later in the tutorial, you will attach a stylesheet to affect the table display.

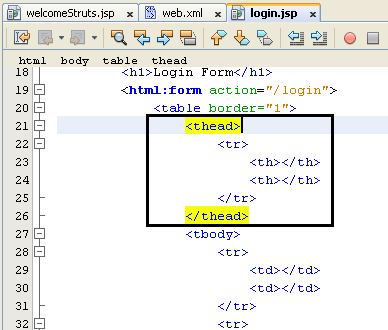
Click OK, then optionally reformat the code (Alt-Shift-F). The form in login.jsp now looks as follows:
<html:form action="/login">
<table border="0">
<thead>
<tr>
<th></th>
<th></th>
</tr>
</thead>
<tbody>
<tr>
<td></td>
<td></td>
</tr>
<tr>
<td></td>
<td></td>
</tr>
<tr>
<td></td>
<td></td>
</tr>
</tbody>
</table>
<html:submit value="Login" />
</html:form>

Note: You can safely delete the <thead> table row, as it is not used in this tutorial.
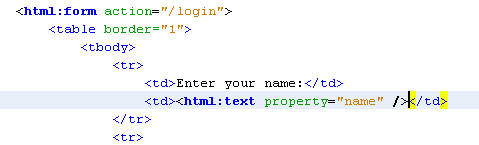
6. In the first table row, enter the following (changes in bold):
<tr>
<td>Enter your name:</td>
<td><html:text property="name" /></td>
</tr>
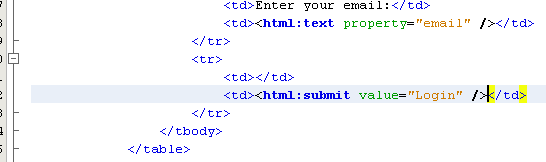
7. In the second table row, enter the following (changes in bold):
<tr>
<td>Enter your email:</td>
<td><html:text property="email" /></td>
</tr>
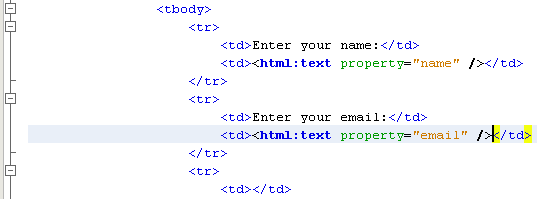
The html:text element enables you to match the input fields from the form with properties in the form bean that will be created in the next step. So for example, the value of property must match a field declared in the form bean associated with this form.
8. Move the <html:submit value="Login" /> element into the second column of the third table row, so that the third table row appears as follows (changes in bold):
<tr>
<td></td>
<td><html:submit value="Login" /></td>
</tr>
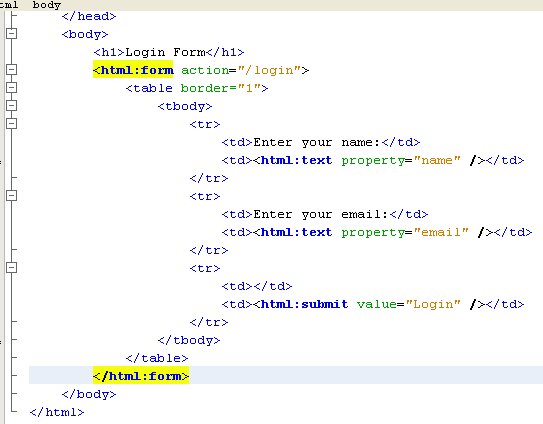
At this stage, your login form should look as follows:
<html:form action="/login">
<table border="0">
<tbody>
<tr>
<td>Enter your name:</td>
<td><html:text property="name" /></td>
</tr>
<tr>
<td>Enter your email:</td>
<td><html:text property="email" /></td>
</tr>
<tr>
<td></td>
<td><html:submit value="Login" /></td>
</tr>
</tbody>
</table>
</html:form>
Strut & Web 1 | Back to Main | Strut & Web 3