< Intro to Snort and Friends | Java & Friends | PHP 3.5.2, Windows XP Pro SP2 and IIS 5.1 >
Windows XP Pro SP2 and Working IIS 5.1
What do we have in this session?
-
Windows XP Pro SP2 and IIS 5.1
-
Install IIS Windows Component
-
The IIS Snap-in: Configuring IIS
-
Testing Web page on IIS
Windows XP Pro SP2 and IIS 5.1
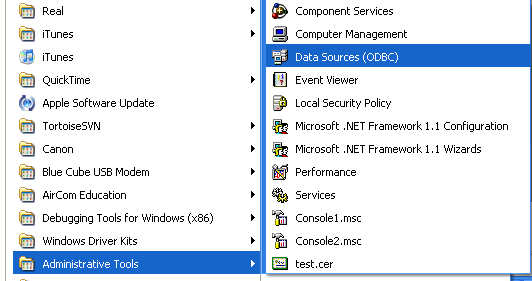
First of all let install and do some basic IIS configuration. IF IIS and other related Windows component was installed on your Windows Machine, the link to the IIS snap-in will be visible from the Start menu: Start > All Programs > Administrative Tools > Internet Information Services. In this case we do not install IIS and its related components.
Install IIS Windows Component
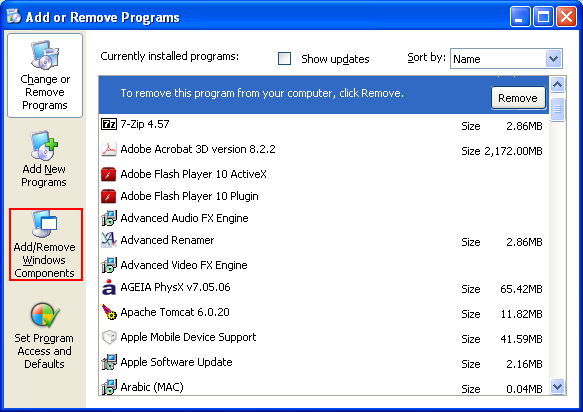
Then open Windows Add or Remove Programs from Control Panel.

Select Add/Remove Windows Components link/icon.
Select Internet Information Services (IIS) and click the Details button to view/select/un-select the IIS sub-components if needed.

In this case we select the following IIS sub-components. Then select World Wide Web (WWW) Service and click the Details button.

We select the following WWW’s sub-components. Click OK.

Then, click Next button.

The installation should begin. If there are no local copies of the installation files (cab files) you will be asked to insert Windows XP xx CD/DVD. So, get ready.


The Internet Information Services (IIS) menu should be visible in the Start Menu.

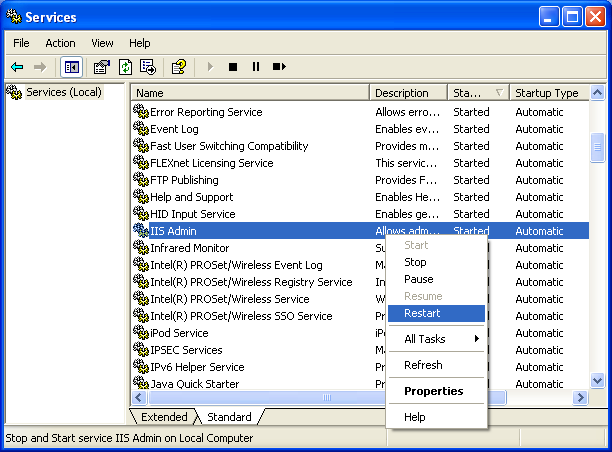
The IIS Admin service also should be visible in the Windows Services snap-in as shown below. The IIS Admin will start automatically when the computer is powered on. Other Windows service control also can be done through Windows Services snap-in such as start, stop, restart and so on.
The IIS Snap-in: Configuring IIS
Next, open IIS snap-in. Open the Default Web Site Properties page (select Default Web Site > right-click mouse).

--------------------------------------------------------------------
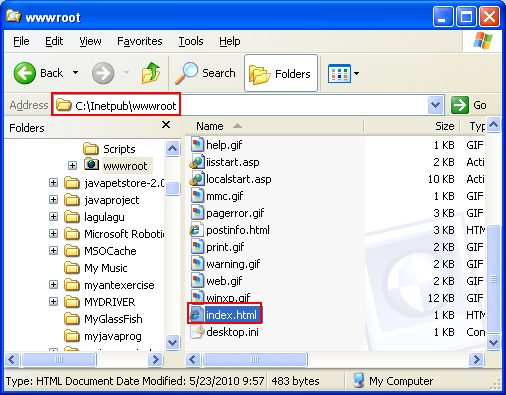
Click the Home Directory tab. The Local Path is where the web’s root folder resides which stores all the web files and folders. The default physical local server path is C:\Inetpub\wwwroot\. We will put all the web files and folders under this folder.

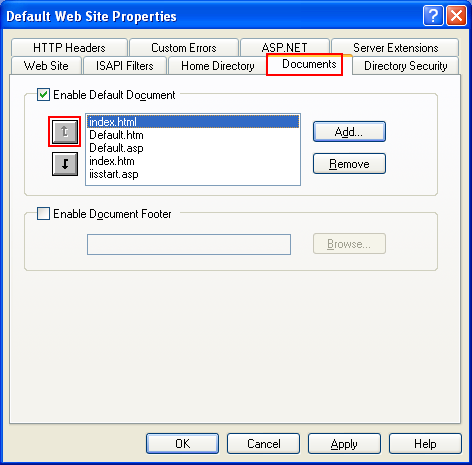
Click the Documents tab. Here we can set the default document (first web page) to be served when user use the default domain name as the URL in their Internet browser. Click the Add button.

Add index.html file and click OK.

Using the up arrow, move index.html to the top level. This means index.html file will be served first to users and if this file is missing, then Default.htm file will be served and so on.
Next, click the Directory Security tab and click the Edit button.
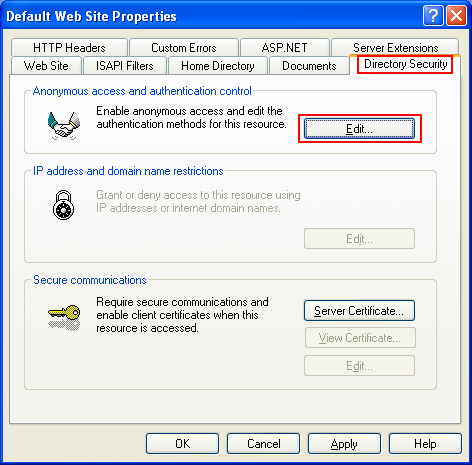
Depending on your web access control, un-check the Integrated Windows authentication check box. In most cases we just use Anonymous access instead of the Authenticated access (which need user credential – username and password to access the web page/site). Click the OK button to exit.

Click the OK button.

Select the Child Nodes (if any) and click the OK button to enforce the inheritance of the new settings.

Now, restart IIS.

Click OK button to restart IIS.

Testing Web page on IIS
Next, let test our newly setup IIS web server. Create index.html file with the following content. You can use any text or HTML editor.
<!DOCTYPE html PUBLIC "-//W3C//DTD HTML 4.01 Transitional//EN">
<html>
<head>
<meta http-equiv="Content-Language" content="en-us">
<title>A very simple test page</title>
</head>
<body>
<p> </p>
<p align="left"><b><font size="5">Some text for IIS testing. The file name is
index.html, put under the default web root directory
<a href="file:///C:/Inetpub/wwwroot">C:\Inetpub\wwwroot</a>. Look like your IIS
is working!</font></b></p>
</body>
</html>
Save the file under the default web root directory.
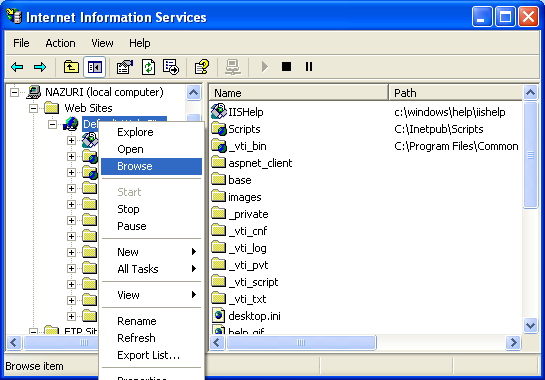
From IIS snap-in windows, select Default Web Site folder > right-click mouse > select Browse menu.
If everything fine, the web page should be visible on the right window.
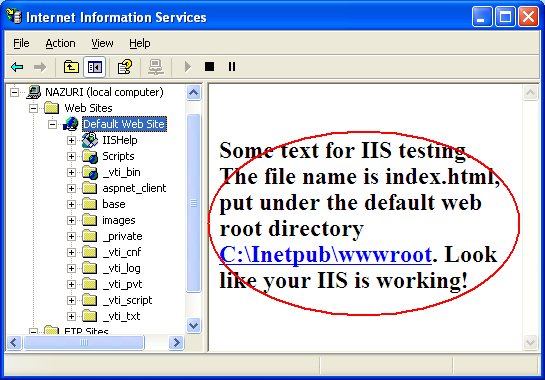
Finally, test the web page (IIS web server) functionality from Internet browser using http://localhost/ or http://127.0.0.1/ as the URL. The following screenshot shows the sample output.
