<Install PHP Eclipse PDT on Windows XP |Main Java & Gang |Install MySQL on Windows XP Pro >
ECLIPSE PHP DEVELOPMENT TOOL (PDT) AND WORDPRESS
In this section we would like try to edit wordpress using Eclipse PDT. The machine specifications used in this task are:
- Intel Pentium Core 2 Duo, 2.2 GHz.
- Windows XP Pro SP2 + periodical patches + periodical updates
- 2 GB DDR2 RAM.
- 160 GB SATA HDD.
- 17” SyncMaster 713N monitor.
- Eclipse PDT.
- PHP 5.3.2 for Windows.
- Apache 2.2.x.
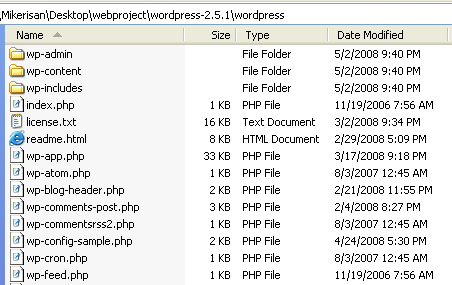
1. First of all download wordpress fromwordpress.org. Uncompress the zip file and the following are wordpress folders and files.
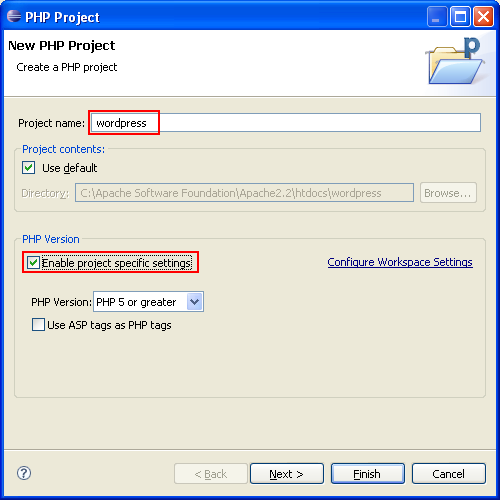
2. Launch PDT and create a new PHP project.
|

3. Name the project as wordpress to match the uncompressed wordpress folders and files. Other settings set to default. Click Next.
4. Nothing was set here. Click Finish.

5. In the PHP Explorer we can see the wordpress project node.

6. The following Figure shows our wordpress project folder’s content as seen in Windows explorer.

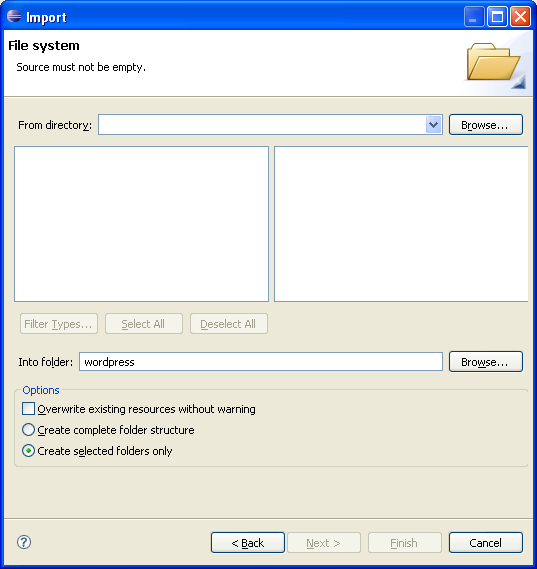
7. Next we will try to import all the wordpress folders and files into our PHP wordpress project. Select and right click the wordpress node > select Import sub menu.

8. Choose General > File System. Click Next.

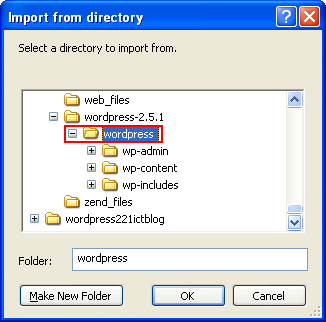
9. Click Browse button at the end of the From Directory: field.
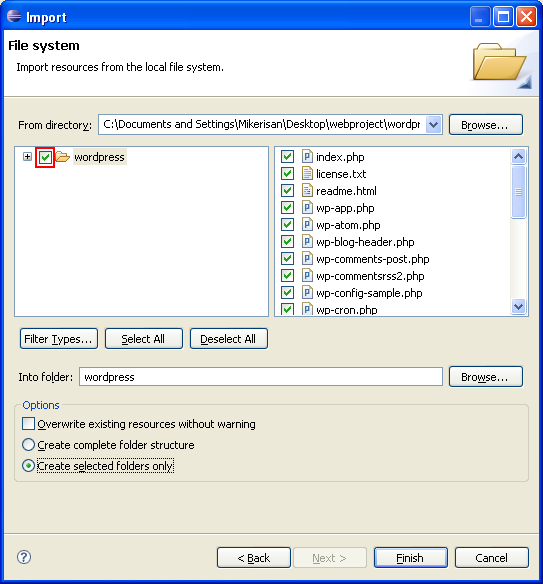
10.Select the wordpress folder and click OK.
11.Select the wordpress folder in the left window. This will select all folders and files contain in the wordpress folder. Click Finish.
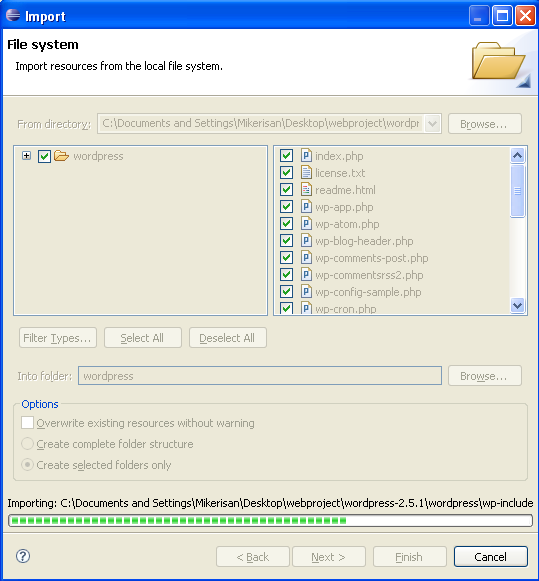
12.The following Figure shows the wordpress folder being imported into our PHP wordpress project.
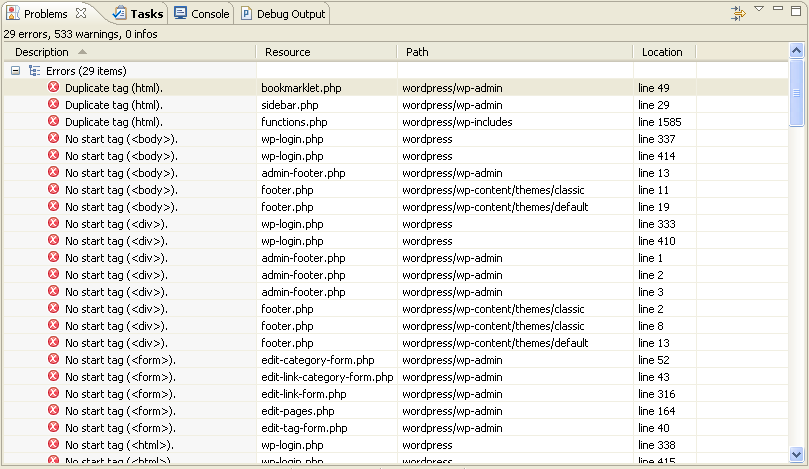
13.Well, there are 29 errors and hundreds warnings.

14.However, when we investigate those errors and warnings, all are 'bogus'. PDT fail to recognize some of the PHP template based project.
15.Let try running this project. Click Run > Open Run Dialog menu.

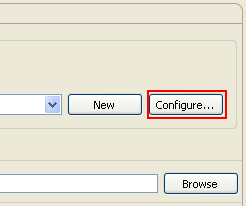
16.We will use the previously configured web config file (testphp_config) with some editing (you can create new config file). Edit the File: and URL fields as shown below. Then click the Browse button.

17.Click the Configure button.
18.Click the Path mapping tab.
 |
19.Click the Add button.
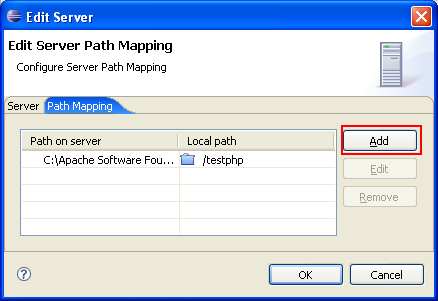
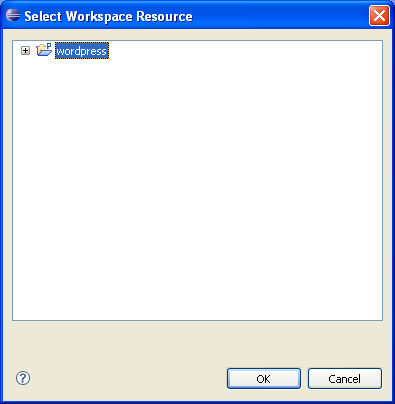
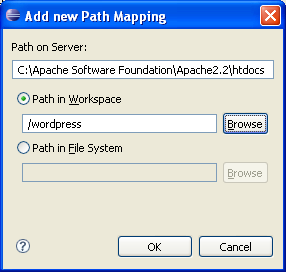
20.Set the Path on Server to C:\Apache Software Foundation\Apache2.2\htdocs and Path in Workspace to /wordpress (use the Browse button).

21.Click the OK button.
22.Select the newly created path mapping and click OK.

23.Click the Run button.

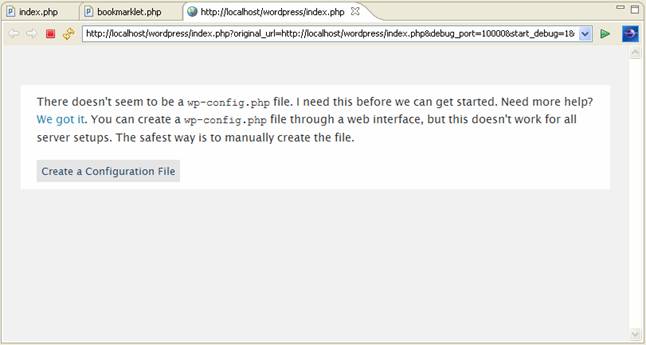
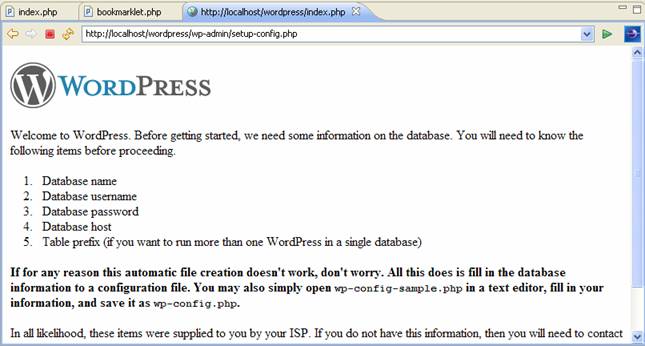
24.Well, it works! In this case we do not setup the MySQL database yet. Click the Create a Configuration File.
25.The wordpress works nicely.
26.Other project settings can be set through the Preferences (Window > Preferences).

-----------------------------------------------------------------
--------------------------------------------------------------------------

27.There are two debuggers:Zend and Xdebug already bundled with PDT.

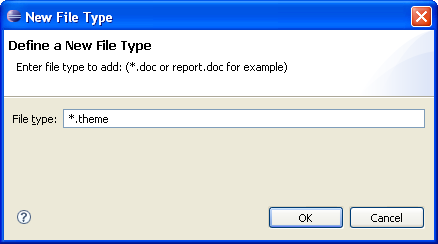
28.What about Drupal? Drupal files have .module, .install etc extensions that do not recognized by PDT. For Drupal to work, you would need to associate .module, .theme, .engine files with PHP. This can be done using: Window > Prefrences > General > Content Types > Text > PHP Content Type. Then, click the Add button, add *.engine, *.install, *.module, *.theme one by one. Eclipse would now recognize all your drupal files and you should be able to debug them.

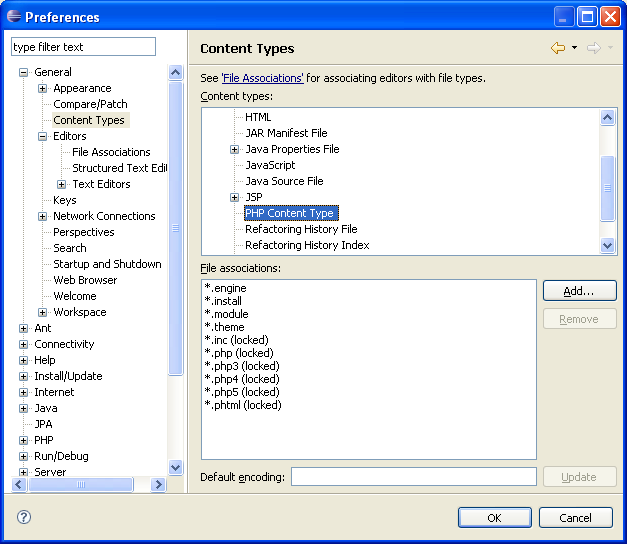
29.Next, you may want to set the file association to the PHP editor. Select Preferences > General > Editors > File Associations, associate *.module and *.install with PHP Editor as shown in the following Figures.

30.Firstly, click the Add button of the Associated Editors: list. Select the PHP Editor and click OK.

31.Next, click the Add button of the File Types: list. Add the new file extensions.


32.You may want to try other IDEs for PHP such as Komodo IDE (commercial and free edition),HomeSite (commercial),Zend Studio (commercial), Aptana (opensource - http://www.aptana.com/) and the latest version of NetBeans.PHPBB andPHPMyAdmin are another PHP based applications that you may want to try opening them in PDT.