Install and Use NetBeans 6.9 part 6
What do we have in this session 6?
-
Creating the JSF Managed Bean and JSF Pages
-
Creating the Managed Bean
Creating the JSF Managed Bean and JSF Pages
In this section you will create the presentation layer for the application using JavaServer Faces (JSF) 2.0 and a managed backing bean that is used by the JSF pages. The JSF 2.0 specification adds support for Facelets as the preferred view technology for JSF-based applications. Starting with JSF 2.0, you can also use the @ManagedBean annotation in your source code to declare a class a managed bean. You are no longer required to add entries in the faces-config.xml file to declare JSF managed beans. You can use bean names in JSF pages to access methods in the managed bean.
|
|
Creating the Managed Bean
In this exercise you will create a simple JSF managed bean that is used to access the session facade. The JSF 2.0 specification that is part of Java EE 6 enables you to use annotations in the bean class to identify the class as a JSF managed bean, to specify the scope and to specify a name for the bean. To create the managed bean, perform the following steps. Right-click the project node and choose New > Other.
|

Select JSF Managed Bean from the JavaServer Faces category. Click Next.

Type MessageView for the Class Name.
You will use the Managed Bean name MessageView as the value for the inputText and commandButton in the JSF page index.xhtml when calling methods in the bean.
Type my.presentation for the Package.
Type MessageView for the Name that will be used for the managed bean.
When you create the managed bean using the wizard, the IDE will by default assign a name to the bean based on the name of the bean class.
Set Scope to request. Click Finish.
-----------------------------------------------------------------------------------------------------------------------------------

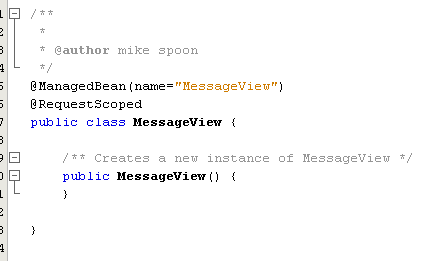
When you click Finish, the IDE creates the bean class and opens the class in the editor. In the Projects window you will see the following files.

In the editor, you can see that the IDE added the @ManagedBean and @RequestScoped annotations and the name of the bean.
You will now add an @EJB annotation to use dependency injection to obtain a reference to the MessageFacade session bean. You will also call the findAll and create methods that are exposed in the session facade. The IDE's code completion can help you when typing the methods.
Right-click in the editor and choose Insert Code (Ctrl+I) to open the popup context menu.

Choose Call Enterprise Bean in the popup menu.

Select MessageFacade in the Call Enterprise Bean dialog box. Click OK.
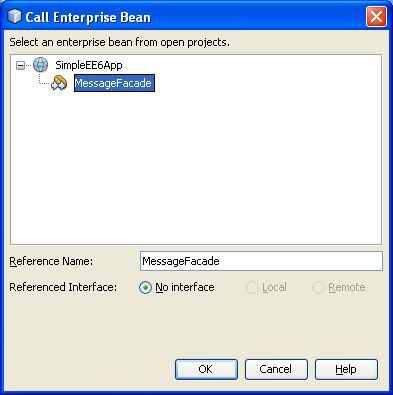
When you click OK, the IDE adds the following code (in bold) to inject the bean.
public class MessageView {/** Creates a new instance of MessageView */public MessageView() {}// Injects the MessageFacade session bean using the @EJB annotation@EJBMessageFacade messageFacade;}
The source code is shown in the editor as shown below.
------------------------------------------------------------------------

Add the following code to create a new instance (MessageView.java).
/** Creates a new instance of MessageView */
public MessageView() {
this.message = new Message();
}
The following is the screenshot.

Next, add the following code to the class (MessageView.java).
// Creates a new field
private Message message;
// Calls getMessage to retrieve the message
public Message getMessage() {
return message;
}
// Returns the total number of messages
public int getNumberOfMessages(){
return messageFacade.findAll().size();
}
// Saves the message and then returns the string "theend"
public String postMessage(){
this.messageFacade.create(message);
return "theend";
}
The following is the screenshot.

Notice that the postMessage method returns the string "theend". The JSF 2.0 specification enables the use of implicit navigation rules in applications that use Facelets technology. In this application, no navigation rules are configured in faces-config.xml. Instead, the navigation handler will try to locate a suitable page in the application. In this case, the navigation handler will try to locate a page named theend.xhtml when the postMessage method is invoked.
Fix your imports (Ctrl-Shift-I) and save your changes. You can use the code completion in the editor to help you type your code.

While fixing the import, you will also having opportunity to remove the unused import by selecting the Remove unused imports tick box.

< NetBeans and Java Web 5 | Java and Friends | NetBeans and Java Web 7 >