<Visual Web JSF: Upload Files |Java & Friends |Insert, Update, Delete & JPA (Derby) >
Java Web Application:
Using Java Persistence API within a Visual Web JSF Application Part 1 (Derby database)
Contents:
-
Machine specifications used in this tutorial
-
Overview
-
Why Use the Java Persistence API
-
Creating a Database
-
Making a Connection to the Database
-
Executing SQL Statements: Creating Table and Inserting Sample Data
-
Inserting More Sample Data
-
Defining Primary Key Values
-
Linking a Visual Web Project to a Java Standard Edition Project
-
Creating the Projects
-
Linking the Projects Together
-
Binding to a Database Table
-
Connecting to the Database
-
Creating a Java Persistence Entity Class Representing the Users Database Table
-
Creating a Persistence Unit
-
Setting Key Attributes With Java Persistence Annotations
-
Generating Primary Key Value With Derby Database
-
Using the Fix Imports Function
-
Creating the Classes
-
Creating the Entity Controller Class
-
Binding the Entity Bean to the Table Component
-
Creating a Property in the Session Bean
-
Creating the Initialization Method
-
Binding the Property to the Table Component
-
Some issue
-
Summary
-
Deleting Java Derby Database
This tutorial (the first of two tutorials) takes you through the set-up steps for using the Java Persistence API from a Visual Web application. You will learn how to use the API to connect or bind to a database table, which gives you access to the data in the table. In the second tutorial ("Modifying Database Table Rows with the Java Persistence API"), you will see how to use the API to add, update, and delete database table rows. In addition, the tutorial includes tips for getting the most from the NetBeans IDE and its visual web functions. The original tutorial can be found atnetbeans.org. All credits must go to the original authors. In this tutorial we try to refine all the steps to more details using screen shots.
Machine specifications used in this tutorial are:
To take advantage of NetBeans IDE 6.0's Java EE 5 capabilities, use an application server that is fully compliant with the Java EE 5 specification such as the Sun Java Application Server 9/GlassFish. This tutorial has been tailored for use with the Sun Java Application Server PE 9.0 Update Release 1 and with Tomcat 6.0.14. If you are using a different server, consult theRelease Notes and user FAQs (http://wiki.netbeans.org/NetBeansUserFAQ) for known problems and workarounds. For detailed information about the supported servers and Java EE platform, see theRelease Notes.
Overview
This tutorial, the first in the series, starts by showing you how to directly bind a NetBeans IDE Visual Web Table Component to an array or list of Objects (also referred to as POJOs or Plain Old Java Objects). Those of you who are familiar with accessing database tables with the Visual Web tools have used the data provider components. You may have dropped a Table component from the Palette onto a page and then dropped a database table onto that Table component. When you dropped the database table onto the page, the Visual Web tools created a data provider component for you, and this data provider handled the database table binding and data access. Now you are going to bind the same Visual Web Table component to a database table without the data provider support; instead, you do the binding using the Java Persistence API. Using JPA, you can obtain the database table data as a list or array of entity beans (POJOs) and directly bind that array to a Visual Web Table component without the intermediate step of using an ObjectListDataProvider or ObjectArrayDataProvider. You can then use the Visual Web Table component features to manipulate the data. In addition to covering using Java Persistence API, we also showcase some of the features of the NetBeans IDE. You'll see how to use the IDE to:
The subsequent tutorials will showcase using specific Visual Web components, such as the Grid Panel component to control page layout.
|
Why Use the Java Persistence API
The Java Persistence API, introduced in the Java EE 5 platform, can be used in enterprise applications like web applications or ejbs and their remote clients deployed onto Java EE 5 environment (e.g. GlassFish) or outside the Java EE platform. If you choose, you can have your application talk directly to the underlying database using JPA and bypassing the Visual Web data provider components.
There are a number of reasons why you might want to use the Java Persistence API. For one, JPA is a simple and lightweight programming model where POJOs (plain old Java objects) are the first-class citizens.
Dealing with entity objects as POJOs leads to other advantages of using the Java Persistence API. Because entities are POJOs, an entity class can extend another entity class or a nonentity class, plus a nonentity class can extend entity classes as well. As POJOs, entity objects can be serialized and sent across the network to other address spaces and also used in a persistence-unaware environment. As a result, you don't have to use any special data transfer objects to send entities to remote locations.
With the Java Persistence API, you use a standard application programming interface to perform typical database operations (the Create/Read/Update/Delete, or CRUD operations) that involve entities. Application portability is also improved. Because it is easier for third-party persistence providers to develop and provide plug-ins to their database systems, you can combine different Java EE containers with different database systems without compromising application portability.
In addition, you can use the native query language of the underlying database to form queries. Furthermore, the packaging rules for entities that use the Java Persistence API are also simplified. Using JPA might be better for you if your application has high transactional throughput requirements because it supports optimistic locking--that is, it avoids locks for the sake of performance-- although as a result some transactions may fail due to collisions with other users.
Creating a Database
The step-by-step instructions that follow assume that you have set up a database called Sample that includes a database table called Users.
1. Go to Tools > Start Server, starting Java (Derby) database server.
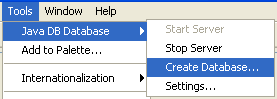
2. Next go to Tools > select Java DB Database > select Create Database, to create a database.

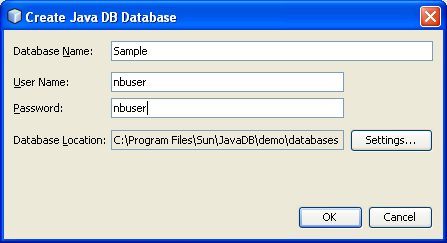
3. Fill in the Database Name: Sample, database User Name: nbuser and its Password: nbuser. Click OK.
Making a Connection to the Database
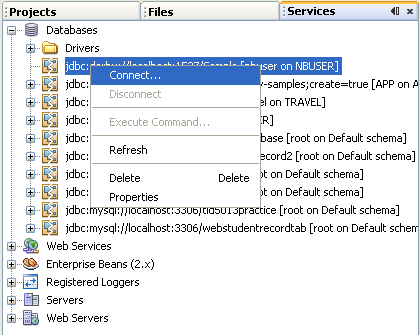
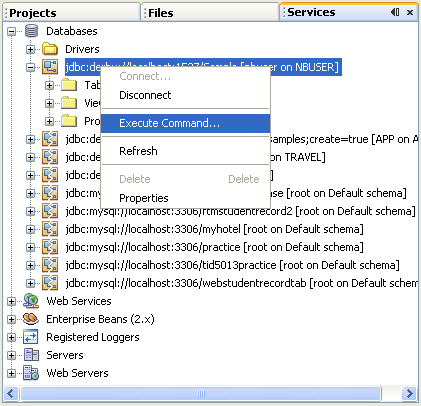
1. Next connect to the Sample database. Select Sample database connection node > right click mouse > select Connect.
2. When the connection to Sample database was established (indicated by the![]() image instead of
image instead of![]() ), select the Sample database connection node again > right click mouse > select Execute Command. In this task we will create a table named Users using SQL script. Keep in mind that Derby database is case sensitive.
), select the Sample database connection node again > right click mouse > select Execute Command. In this task we will create a table named Users using SQL script. Keep in mind that Derby database is case sensitive.
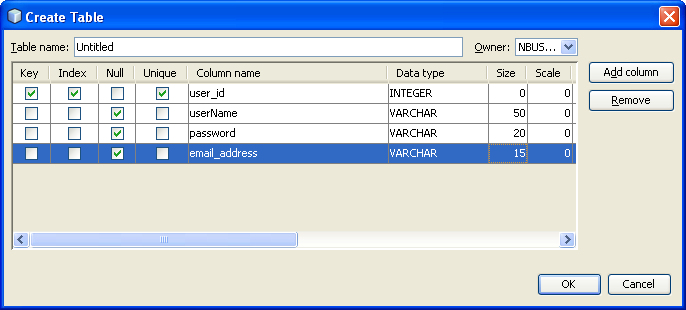
The Users table should have four columns, as follows:
user_id - Primary key; Type: Integer
userName - Type: String
password - Type: String
email_address - Type: String
Executing SQL Statements: Creating Table and Inserting Sample Data
You can add the Users table to the sample Derby database using the Databases node in the Services window. You can execute the following SQL script from a file to create this table or execute each line of SQL code individually.
As an example, you can use the following SQL script template to create the Users table in the Derby sample database. Note that the clause GENERATED ALWAYS AS IDENTITY indicates that the user_id primary key value will be generated and automatically incremented by the Derby DBMS when it adds a new record. If you manually add records to this table, such as with the INSERT INTO code, be sure to use the reserved word DEFAULT to indicate that the value of user_id is supplied by the database. Take note on the use of double quotes, Derby is case sensitive and the “NBUSER” is a schema. In this tutorial we are using the following SQL script.
/* create a table */
create table "NBUSER"."Users" (
"userName" VARCHAR(50),
"password" VARCHAR(12),
"email_address" VARCHAR (50),
"user_id" INTEGER GENERATED always AS IDENTITY
);
/* add a primary key */
alter table "Users" add constraint usersPK PRIMARY KEY ("user_id");
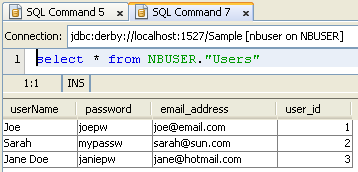
/* insert a sample data */
INSERT INTO "Users" VALUES ('Joe', 'joepw', 'joe@email.com',DEFAULT);
INSERT INTO "Users" VALUES ('Sarah', 'mypassw', 'sarah@sun.com', DEFAULT);
INSERT INTO "Users" VALUES ('Jane Doe', 'janiepw', 'jane@hotmail.com', DEFAULT);
The Execute Command function opens an Editor window to which you can enter one or more lines of SQL code.
1. Execute the contents of the window by clicking the Run button (![]() ). Be sure that the Connection field indicates you are connected to the sample database.
). Be sure that the Connection field indicates you are connected to the sample database.

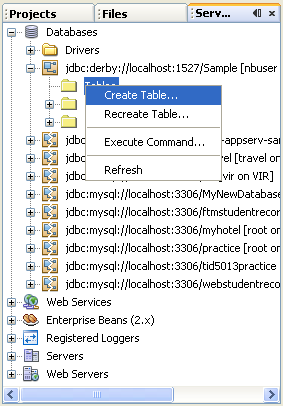
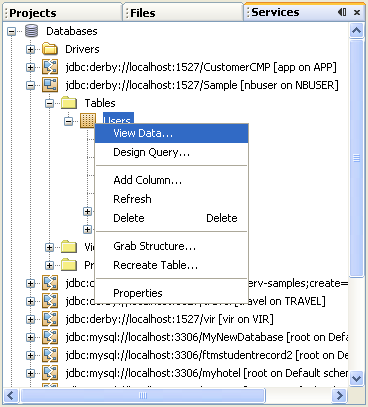
2. Or you can use the context menu functions for the database table nodes in the Services window (formerly called the Runtime window) include functions to create new tables and execute SQL code.
3. View the populated sample data by selecting the View Data context menu.

Inserting More Sample Data
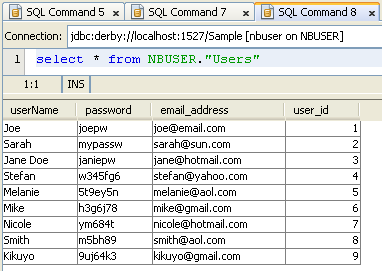
1. Execute the following SQL script to insert more sample data.
INSERT INTO "Users" VALUES ('Stefan', 'w345fg6', 'stefan@yahoo.com', DEFAULT);
INSERT INTO "Users" VALUES ('Melanie', '5t9ey5n', 'melanie@aol.com', DEFAULT);
INSERT INTO "Users" VALUES ('Mike', 'h3g6j78', 'mike@gmail.com', DEFAULT);
INSERT INTO "Users" VALUES ('Nicole', 'ym684t', 'nicole@hotmail.com', DEFAULT);
INSERT INTO "Users" VALUES ('Smith', 'm5bh89', 'smith@aol.com', DEFAULT);
INSERT INTO "Users" VALUES ('Kikuyo', '9uj64k3', 'kikuyo@gmail.com', DEFAULT);
2. Do some verification.
Defining Primary Key Values
You can use the following code to create the Users table in the Derby sample database. Note that the clause GENERATED ALWAYS AS IDENTITY indicates that the user_id primary key value will be generated and automatically incremented by the Derby DBMS when it adds a new record. If you manually add records to this table, such as with the INSERT INTO code, be sure to use the reserved word DEFAULT to indicate that the value of user_id is supplied by the database.
There are other ways to define the primary key value with Derby. In addition to the Derby Reference Manual, which you can find from theApache Derby site, or Oracle db at Oracle DB on the subject. Keep in mind, however, that different database management systems handle primary key values differently. For example, with MySQL, the table definition for generating and auto incrementing the primary key is:
'user_id' int(10) unsigned NOT NULL auto_increment, ...
Later, you will generate an entity class from this database table definition. The generated entity class is the Java Persistence representation of the database table. Since TopLink is the reference implementation for JPA, you can refer to theTopLink documentation for more information on id generation. With Derby, you will have to manually add an annotation to the generated class to indicate the generated value strategy (@GeneratedValue) for the primary key. With MySQL, you do not need to specify a generated value strategy in this entity class.
Linking a Visual Web Project to a Java Standard Edition Project
To use the Java Persistence API from a Visual Web application, you actually create two projects. One project is your Visual Web project. The other is aJava Standard Edition (SE) application project that includes several classes whose code the web application will call. From within this Java SE application project, you generate a persistence unit to get a handle to the Java Persistence API. Your web application then uses the classes created in the Java SE application project to establish the database binding, and later to do the database update, delete, and add operations.
Creating the Projects
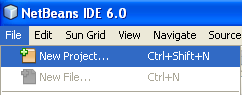
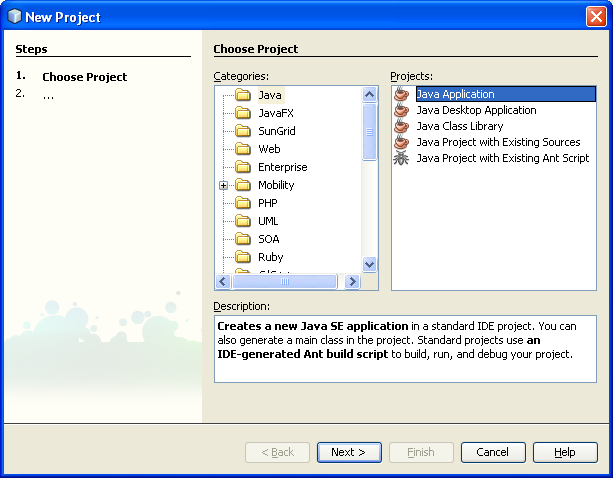
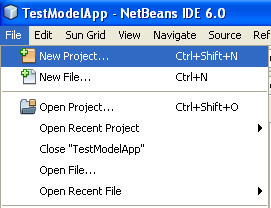
1. Create the Java SE application project. Begin by creating the Java SE application project, which is a general Java project. Click the New Project icon in the toolbar (Ctrl+Shift+N), then select Java in the Categories column and Java Application in the Projects column. Then click Next.
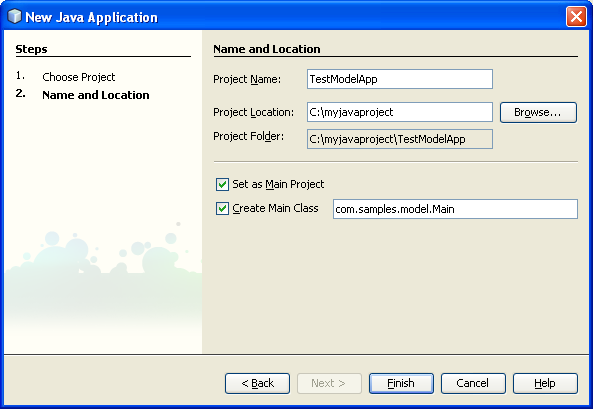
2. In the New Java Application screen, set the project name to TestModelApp. You also need to set the package to com.samples.model. You can do this by changing the default Create Main Class entry from testmodelapp.Main to com.samples.model.Main. Click Finish.
3. Create the Visual Web project. From the New Project dialog, select Web as the category and Web Application as the project, then click Next.

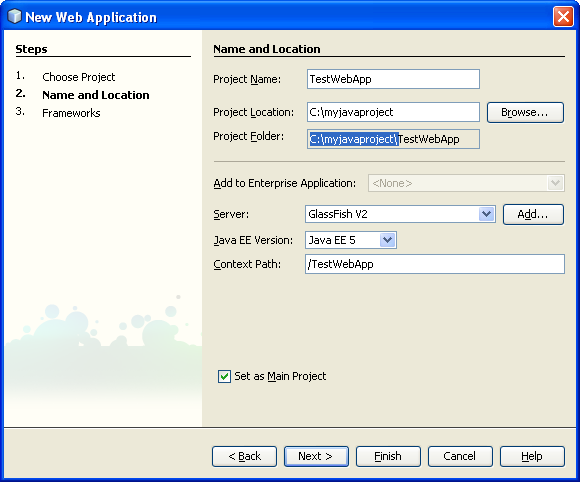
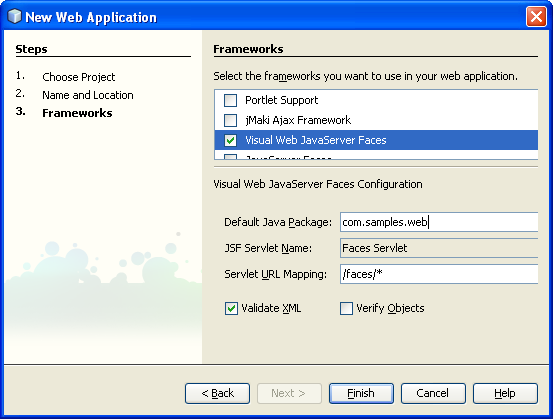
4. In the New Web Application dialog, set the project name to TestWebApp. The project location should default to the same location as the TestModelApp project. Click Next to go to the screen where you select the framework.
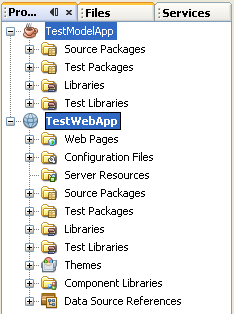
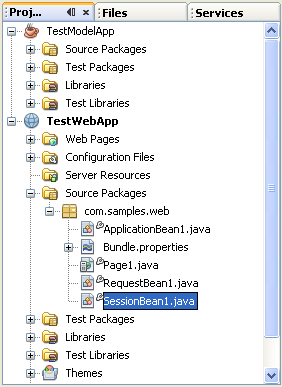
5. Select Visual Web JavaServer Faces for the framework. When you make this selection, the screen displays configuration settings. Change the Default Java Package setting from testwebapp to com.samples.web. After completing this step, TestModelApp and TestWebApp appear as nodes in the Project window. Click Finish.
Linking the Projects Together
Now you want to link the two projects together. Specifically, you want the TestModelApp project to be a dependency of the TestWebApp project. To make TestModelApp a dependent project of TestWebApp, you need to add the TestModelApp.jar file to the TestWebApp project. Here's how to do this:
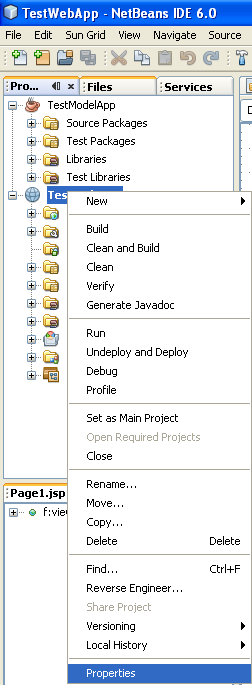
1. In the Projects window, right Click the TestWebApp project node and select Properties from its context menu.
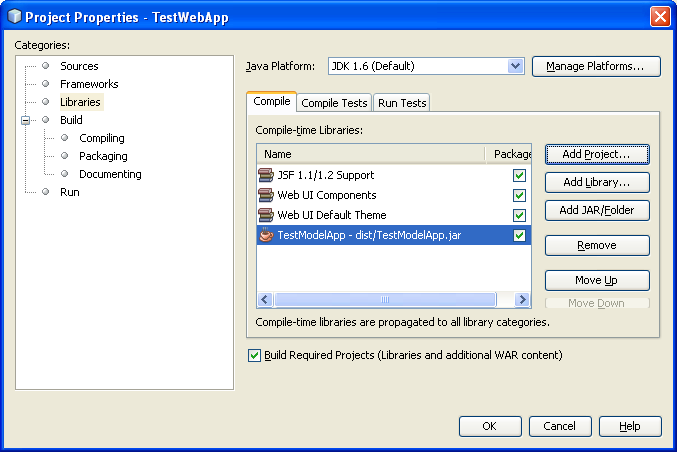
2. In the Project Properties dialog, click the Libraries node in the Categories section on the left. Then, click Add Project.
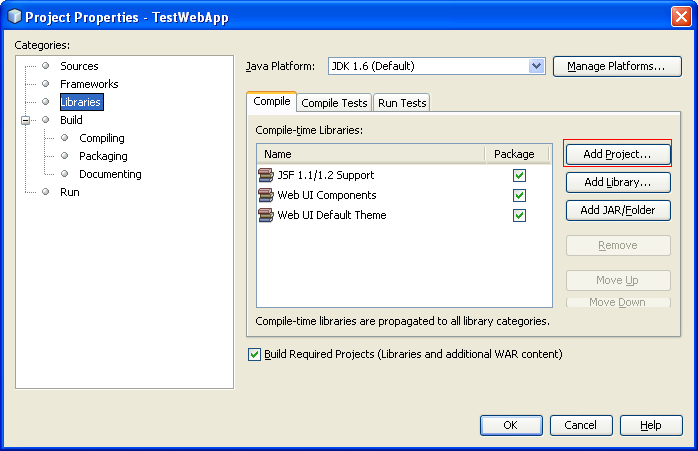
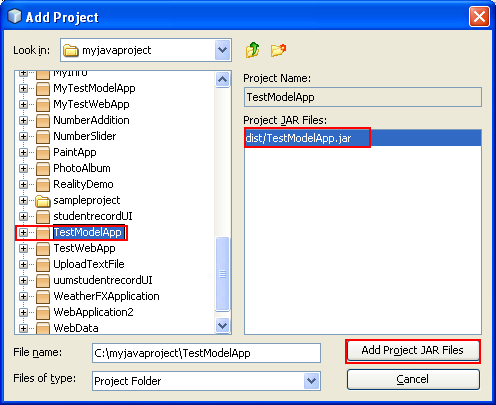
3. In the Add Project window, browse to the location with the TestModelApp project and select it. Then click Add Project JAR Files. This step adds the TestModelApp jar file to the compile-time libraries for the TestWebApp project, and TestModelApp appears in the Project Properties screen. Click OK in the Project Properties screen to complete the process.
Binding to a Database Table
You use the Java Persistence API to convey information back and forth from a database table to the table visual component that's used in the Visual Web JSF application. After you do this binding, you use the API to retrieve rows from the database table, but you display the data using the Visual Web Table component's built-in display features.
Connecting to the Database
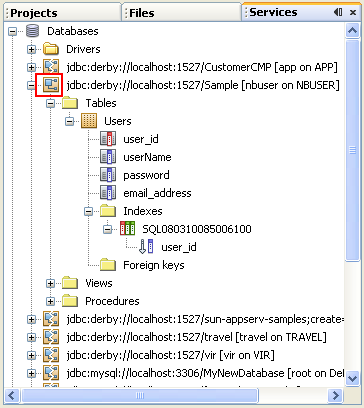
To begin, you connect to the database with the Users table from within the TestWebApp project. If you are using the Sample Derby database and have not yet connected to it, open the Services window, expand the Databases node, open the context menu for the jdbc:derby://localhost:1527/Sample [nbuser on NBUSER] node and choose Connect. If you are using a different DBMS, then, if needed, set up a driver for that database and create a new connection, providing the necessary connection parameters. We already completed this task.
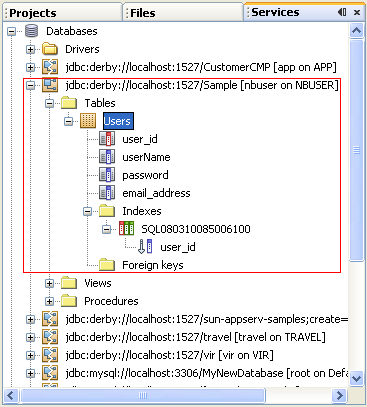
If you have not yet created the Users table, now is the time to do so, see Executing SQL Statements: Creating Table and Inserting Sample Data section. From the Services window, verify that the connection to the database is established. Open the Databases > Sample database Tables node and verify that the Users table is correct.
|
Creating a Java Persistence Entity Class Representing the Users Database Table
Create an entity class representing the Users table. As noted previously, the entity class is the Java Persistence representation of the database table definition. JPA uses Java language annotation feature to mark Plain Old Java Objects (POJOs) as JPA entities with information on object-relation mapping. Create the entity class from within the TestModelApp project using the Entity Classes from Database function.
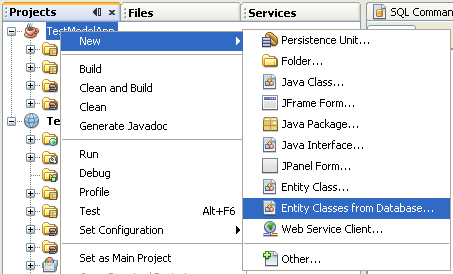
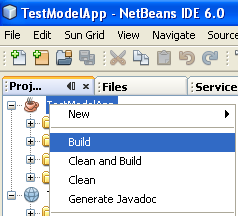
1. In the Projects (or Files) window, right click the TestModelApp project. From the context menu, select New > Entity Classes from Database.
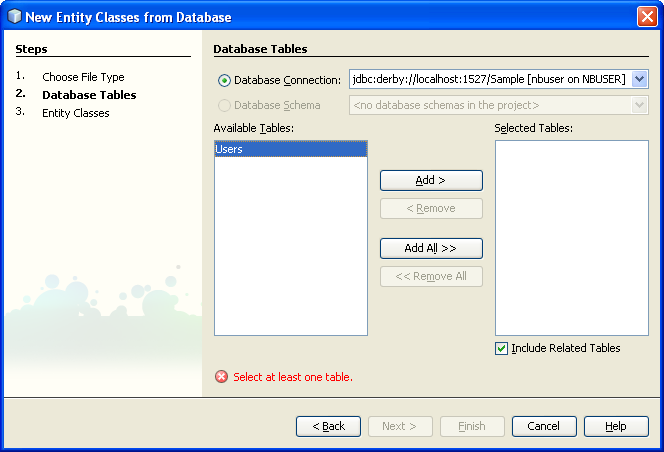
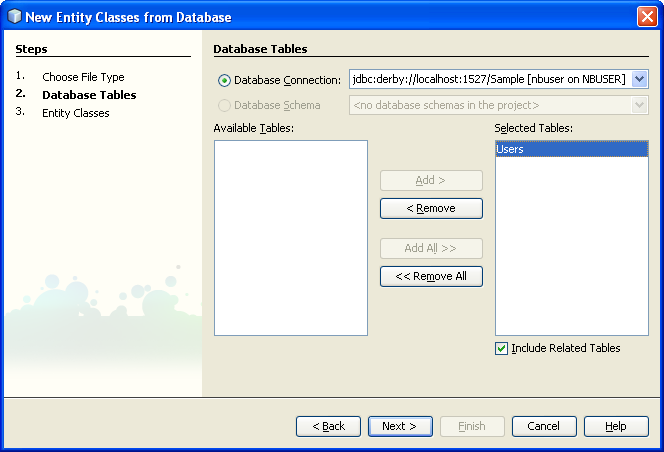
2. The New Entity Classes from Database Database Tables dialog displays. If the Database Connection field is blank, then select the sample database from the pull-down list. The Available Tables column displays all the tables in the sample database, including the Users table. Select the Users table and click Add to move Users to the Selected Tables column. Click Next after moving the Users table.
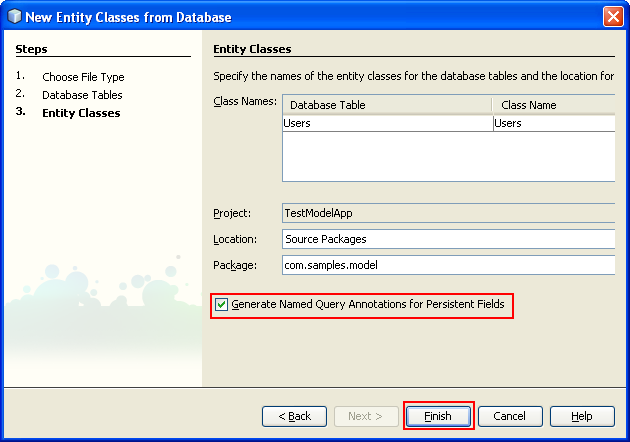
3. The Entity Classes dialog displays. The IDE displays the database table name Users, and suggests a class name of Users. (Double click this class name to change it, if you want.) The dialog also indicates that the package is com.samples.model. Click Create Persistence Unit.
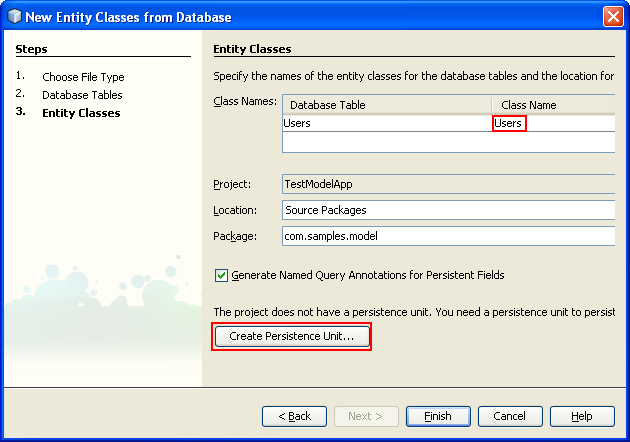
Change the Persistence Unit Name from DefaultTestModelAppPU to samplePU.
Creating a Persistence Unit
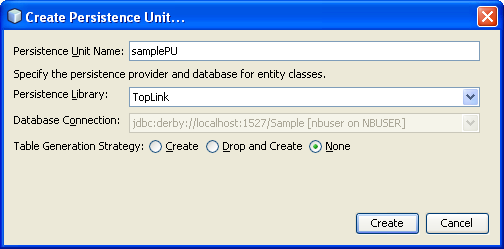
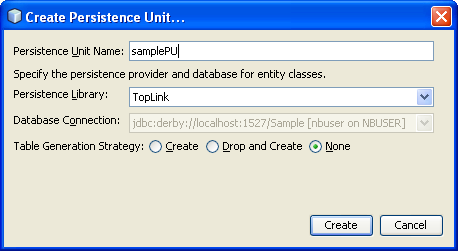
1. As done previously, in the Create Persistence Unit dialog, set the Persistence Unit Name to samplePU. Leave the other fields with the default values. Click Create, then click Finish in the Entity Classes screen to complete the operation and create thesamplePU persistence unit.
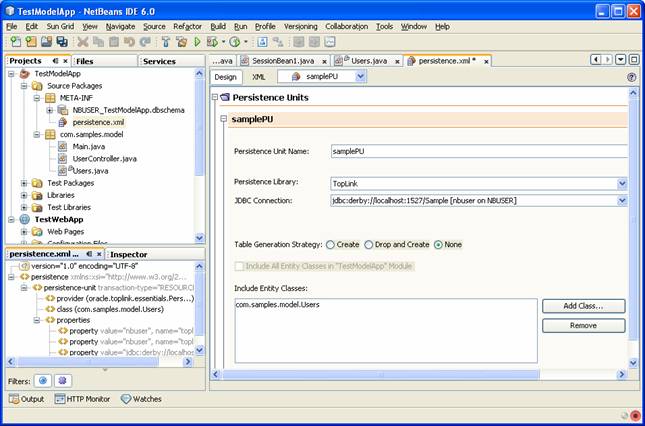
2. It is a good idea to verify that the persistence unit is created correctly. To do so, expand the TestModelApp Source Packages > META-INF node and double click the persistence.xml file. The Design window displays information about the persistence unit, while the Navigator window shows the XML properties.
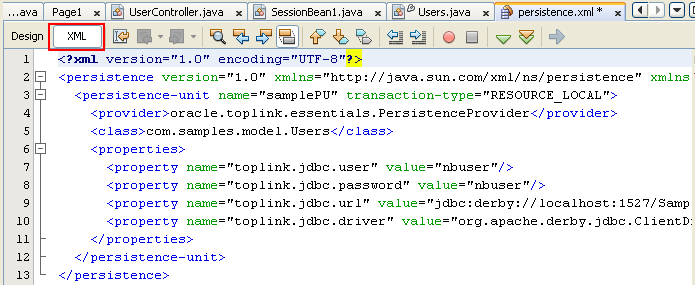
3. Click the XML tab to see the complete XML listing. The properties in the file should correctly reflect the database name, its url, driver, and password, along with the package and class name (com.samples.model.Users). The transaction type is RESOURCE_LOCAL and the provider is oracle.toplink.essentials.PersistenceProvider. Important: Be sure that the password field is filled in correctly.
Setting Key Attributes With Java Persistence Annotations
If you are working with the Derby database, you need to make some modifications to the generated Users.java code to handle auto generation of the primary key value. However, other database systems may handle primary key value generation differently, and any modifications you make to the generated Users.java class must match the underlying database's primary key generation policies.

The @Id and @GeneratedValue Annotations
After you create the Users entity class you need to modify the class so that the primary key field (the user_id field) is automatically generated by the database. JPA identifies the primary key with the @Id annotation. You add a second annotation to the primary key that indicates the strategy for generating the primary key value: @GeneratedValue(strategy=GenerationType.<...>), where the strategy clause is optional. Note that the generation strategy you choose must correlate with the capabilities of your database.
Generating Primary Key Value With Derby Database
Since the Derby database supports the IDENTITY column type and thus can generate a unique value for the primary key, we pass that responsibility to the database. Thus, add the following line of code to the primary key definition:@GeneratedValue(strategy = GenerationType.IDENTITY). The Users.java code defining the table should look as follows after you make your modifications:
Code Sample 1: Modified Users.java Class
...
public class Users implements Serializable {
private static final long serialVersionUID = 1L;
@Column(name = "userName")
private String userName;
@Column(name = "password")
private String password;
@Column(name = "email_address")
private String emailAddress;
@Id
@GeneratedValue(strategy = GenerationType.IDENTITY)
@Column(name = "user_id", nullable = false)
private Integer userId;
public Users() {
}
...

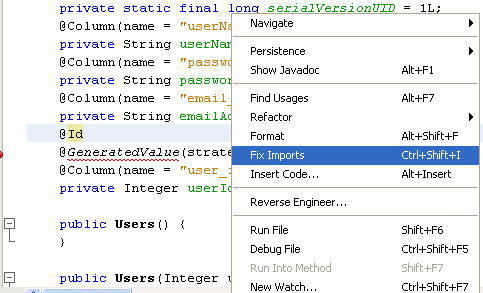
Using the Fix Imports Function
Note that the @GeneratedValue tag requires two classes: javax.persistence.GeneratedValue and javax.persistence.GenerationType. Use the Fix Imports function to import these classes. Right click anywhere in the source editor window and select Fix Imports from the pop-up menu.
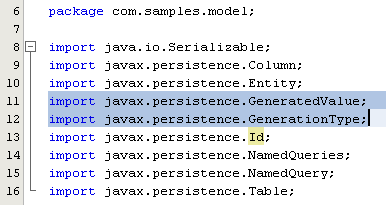
You need to do this two times. The Fix Imports function adds these two import statements to the class:
import javax.persistence.GeneratedValue;
import javax.persistence.GenerationType;
As noted above, other databases may require a different modification to the Users.java code, or no modification at all. For example, with a MySQL database, you do not need to include the @GeneratedValueannotationsince the database automatically generates the primary key value if you specify auto_increment for the user_id column when you create the table definition.
Creating the Classes
Creating the Entity Controller Class
You continue to work in the TestModelApp project, creating a new class called UserController in the com.samples package. (We provide the code for this class below, and you can paste it into your class.) Expand the TestModelApp > Source Packages > com.samples.model node.
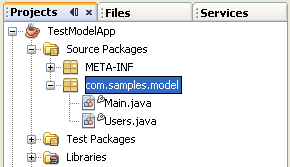
Notice that there are already two classes in the package: model.java and Users.java. Right click the com.samples.model node and select New > Java Class.
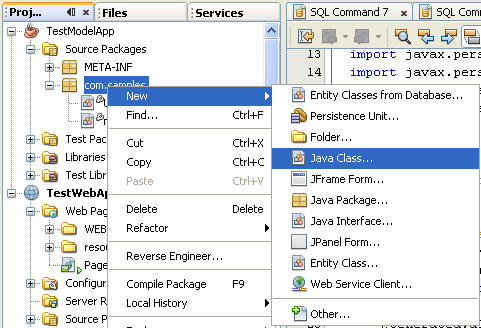
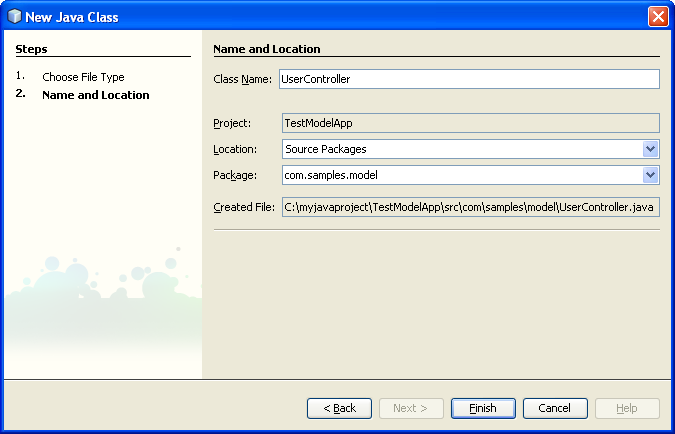
In the New Java Class dialog, set the class name to UserController (leave the location as Source Packages and the package name as com.samples). Click Finish.
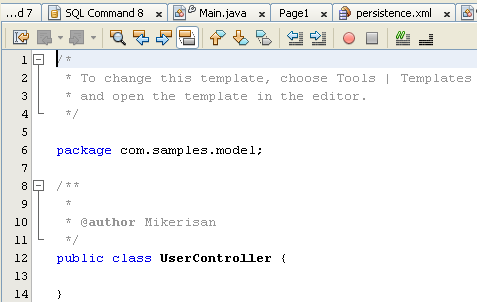
You should see the skeleton source code for this new class in the Edit window.
Add the following code to the class:
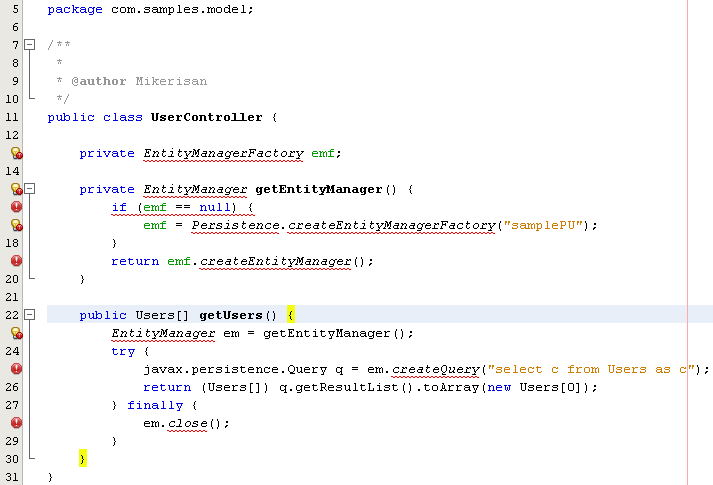
Code Sample 2: UserController Code
private EntityManagerFactory emf;
private EntityManager getEntityManager() {
if(emf == null){
emf = Persistence.createEntityManagerFactory("samplePU");
}
return emf.createEntityManager();
}
public Users[] getUsers() {
EntityManager em = getEntityManager();
try{
javax.persistence.Query q = em.createQuery("select c from Users as c");
return (Users[]) q.getResultList().toArray(new Users[0]);
} finally {
em.close();
}
}
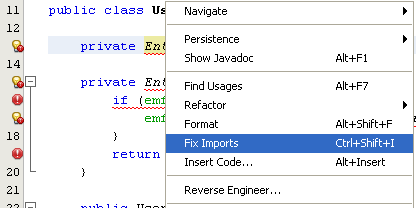
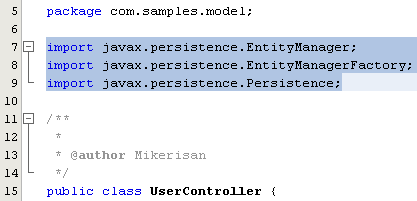
Use the Fix Imports function to import the required classes. (Right click in the source editor window and select Fix Imports from the pop-up menu.)
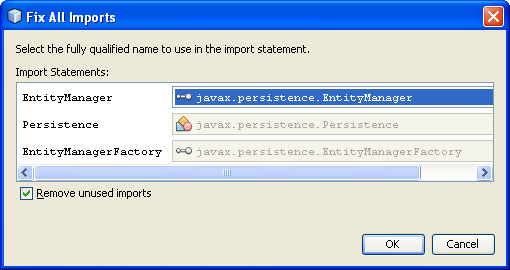
Doing so adds the following three import statements to the class:
import javax.persistence.EntityManager;
import javax.persistence.EntityManagerFactory;
import javax.persistence.Persistence;
You can use the Format function, available from the same pop-up menu, to format the code alignment.

Notice that the UserController class includes the method getUsers, which invokes the createQuery method on the javax.persistence.EntityManager interface to create a query that returns the rows of data from the Users table. The results of the query are returned as an array.
Binding the Entity Bean to the Table Component
You are ready to bind the entity component for accessing the Users database table to a Table component in the TestWebApp project. (Recall that you created the entity bean in the TestModelApp.) You do this binding from within the TestWebApp project. Here are the binding steps:
Create a property in SessionBean1 that returns an array of Users objects.
Create a method to initialize the array.
Then, bind the array of Users objects to the Table component.
Use the Java Persistence API Entity Manager to invoke the Users array initialization method.
Let's examine these steps in more detail.
Creating a Property in the Session Bean
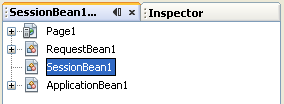
In the NetBeans IDE, you can find managed beans in several locations: in the Navigator window, in the source packages node in the Projects window, and in the src > java > project-name node in the Files window.
1. First, create a property in SessionBean1 that returns an array of Users objects. In the Navigator window, double click SessionBean1 to open it in the Java Source Editor. Or, double click SessionBean1 from within the Projects window TestWebApp > Source Packages > com.samples.web node. If you do not see the Navigator window, try displaying a page from TestWebApp, such as Page1, in the Design window. The Navigator window should display beneath the Projects window. If you still do not see the Navigator window, click the Design tab in the Design window.
2. Add a property called users to SessionBean1. Type in the following line of code: private Users[] users;
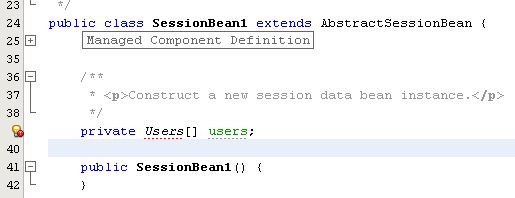
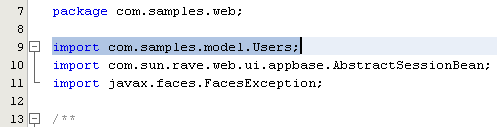
3. Fix imports. Most likely, the line you just entered will be marked as an error. If so, use the source editor's context menu Fix Imports function to fix this error. (Be sure to correct this error before continuing to the next step.) To fix the error, the IDE adds the following import statement: import com.samples.model.Users;
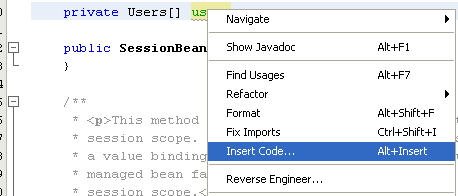
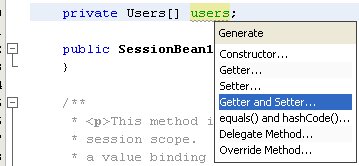
4. Generate get and set methods for the users property. Right click the line of code you typed in and select the action Insert Code. Choose Getter and Setter from the popup menu. Then, select users: Users[ ].
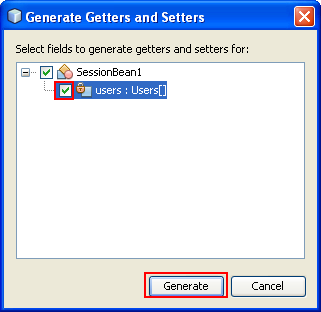
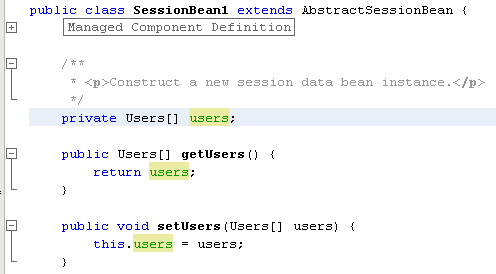
The Insert Code action adds public get and set methods. When finished, SessionBean1 should include the following code.
Code Sample 3: Get and Set Methods for users Property
private Users[] users;
public Users[] getUsers() {
return users;
}
public void setUsers(Users[] users) {
this.users = users;
}
Creating the Initialization Method
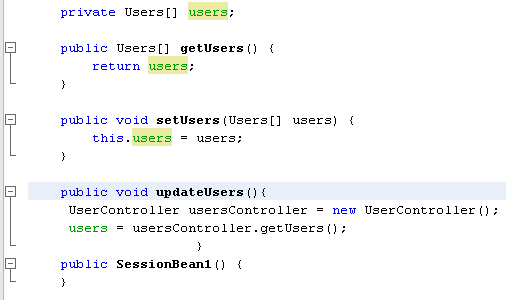
1. Add a method called updateUsers to SessionBean1. This method will be used to initialize the users property. Here's the code for the method:
Code Sample 4: updateUsers Method
public void updateUsers(){
UserController usersController = new UserController();
users = usersController.getUsers();
}
2. Use the Fix Imports function to fix the import needed for updateUsers. If there are errors in the code, do a Save All files to clear them.
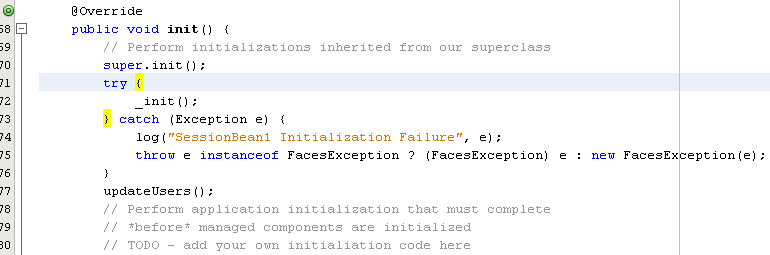
3. Add a call to the updateUsers method in the SessionBean1 init method: updateUsers();. The SessionBean1 init method should look as follows (comment lines not shown):
Code Sample 5: SessionBean1 init Method
public void init(){
super.init();
try {
_init();
} catch (Exception e) {
log("SessionBean1 Initialization Failure", e);
throw e instanceof FacesException ? (FacesException) e: new FacesException(e);
}
updateUsers();
4. Save all the files.
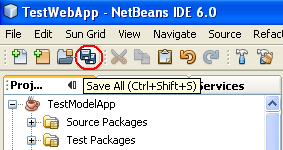
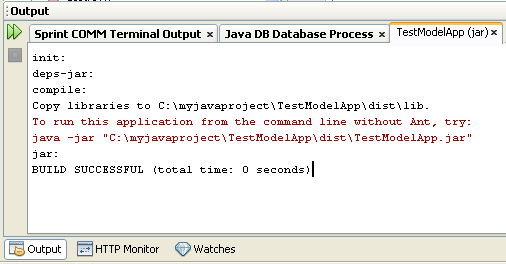
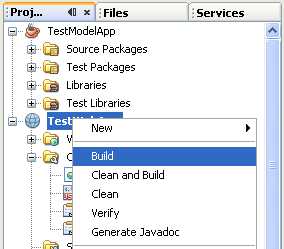
5. Build both the TestModelApp and TestWebApp projects.
Binding the Property to the Table Component
Now you are ready to bind the users property you just added to a Table component.
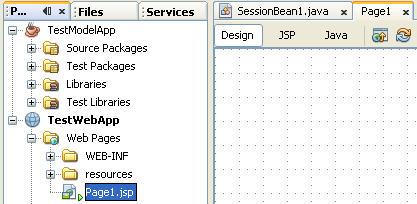
1. From TestWebApp > Web Pages, double click Page1.jsp to open the page in the Design window.
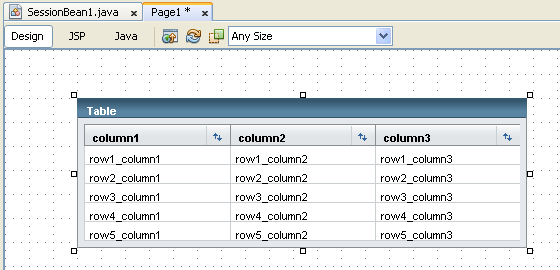
2. Drag a Table component from the Palette and drop it on the page in the Design window. It should as follows:

---------------------------------------------------------------------------------------------------------------------------
----------------------------------------------------------------------------------------------------------------------------
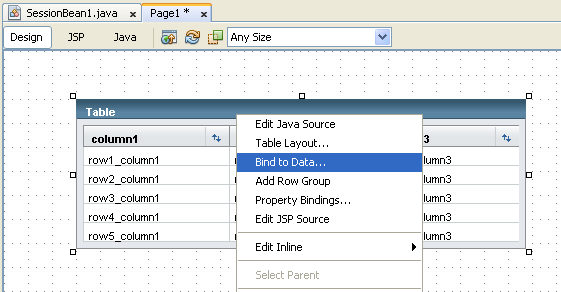
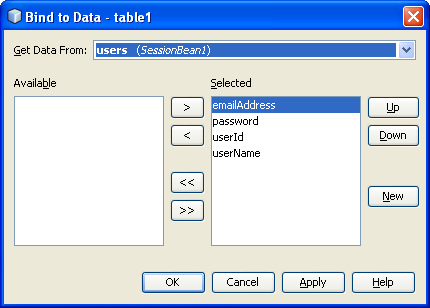
3. Right click the Table component on the page and click Bind to Data from its context menu.
4. In the Get Data From drop down list, select users (from SessionBean1) as the binding array. (Note that if you do not see the users property displayed in the drop down list, right click in the Design window and click the Refresh option in the context menu. Or simply click the Refresh button in the toolbar. If you still do not see the users property displayed in the drop down list, then close and reopen the TestWebApp project.) Click OK.
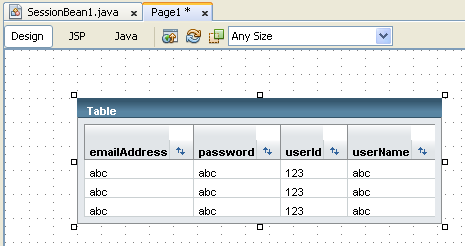
5. The Table component display in the Design window should change to the following. If needed, adjust the columns to be displayed.
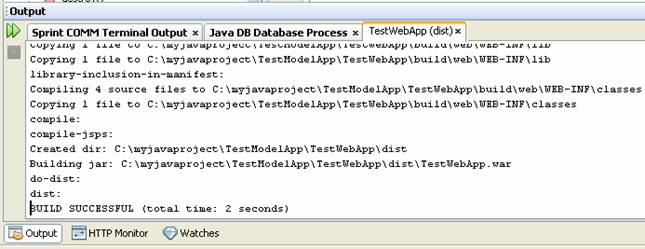
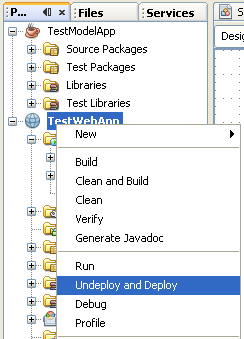
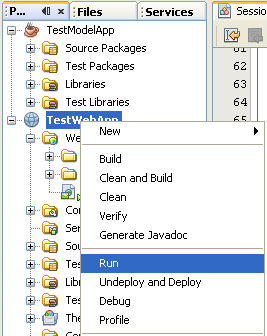
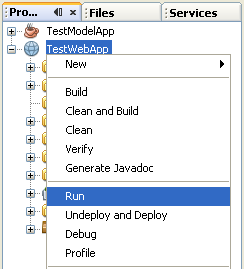
6. Deploy and run the TestWebApp project.
-----------------------------------------------------An issue ----------------------------------------------------
It is bug or what?
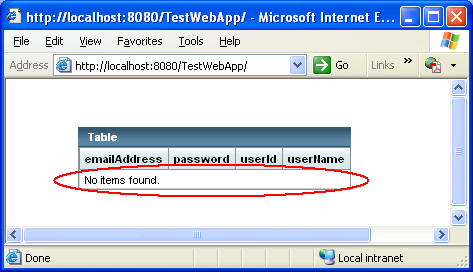
We found that we need to put the escape sequence (\") for the table and columns names otherwise there will be error in finding the table (and the columns of course) as shown in the following stack trace (Glassfish V2 output window) during the project running and no data will be displayed in the table.
........
[TopLink Warning]: 2008.03.11 09:44:54.781--UnitOfWork(31058022)--Exception [TOPLINK-4002] (Oracle TopLink Essentials - 2.0 (Build b58g-fcs (09/07/2007))): oracle.toplink.essentials.exceptions.DatabaseException
Internal Exception: java.sql.SQLSyntaxErrorException: Table/View 'USERS' does not exist.
Error Code: -1
Call: SELECT "user_id", "userName", "password", "email_address" FROM Users
Query: ReportQuery(com.samples.Users)
PWC2775: Session attribute event listener threw exception
Local Exception Stack:
Exception [TOPLINK-4002] (Oracle TopLink Essentials - 2.0 (Build b58g-fcs (09/07/2007))): oracle.toplink.essentials.exceptions.DatabaseException
Internal Exception: java.sql.SQLSyntaxErrorException: Table/View 'USERS' does not exist.
Error Code: -1
Call: SELECT "user_id", "userName", "password", "email_address" FROM Users
Query: ReportQuery(com.samples.Users)
at oracle.toplink.essentials.exceptions.DatabaseException.sqlException(DatabaseException.java:319)
at oracle.toplink.essentials.internal.databaseaccess.DatabaseAccessor.basicExecuteCall(DatabaseAccessor.java:566)
at oracle.toplink.essentials.internal.databaseaccess.DatabaseAccessor.executeCall(DatabaseAccessor.java:452)
at oracle.toplink.essentials.threetier.ServerSession.executeCall(ServerSession.java:473)
…
[trimmed]
…
at oracle.toplink.essentials.internal.queryframework.ExpressionQueryMechanism.selectAllReportQueryRows(ExpressionQueryMechanism.java:2382)
…
[trimmed]
…
at oracle.toplink.essentials.internal.ejb.cmp3.base.EJBQueryImpl.executeReadQuery(EJBQueryImpl.java:367)
at oracle.toplink.essentials.internal.ejb.cmp3.base.EJBQueryImpl.getResultList(EJBQueryImpl.java:478)
at com.samples.UserController.getUsers(UserController.java:30)
at com.samples.web.SessionBean1.updateUsers(SessionBean1.java:50)
at com.samples.web.SessionBean1.init(SessionBean1.java:77)
at com.sun.rave.web.ui.appbase.servlet.LifecycleListener.attributeAdded(LifecycleListener.java:327)
at org.apache.catalina.session.StandardSession.setAttribute(StandardSession.java:1706)
at org.apache.catalina.session.StandardSessionFacade.setAttribute(StandardSessionFacade.java:163)
To rectify this, please add an escape sequence (\”) to the table and columns names as shown below. This is a case sensitiveness issue.
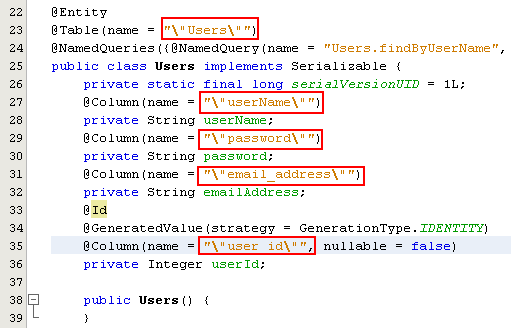
----------------------------------------- End issue ----------------------------------------------------
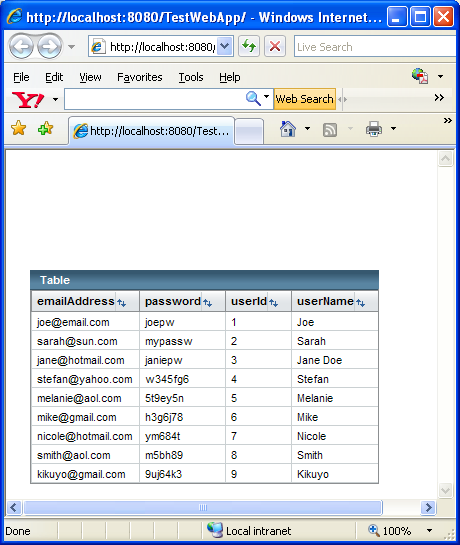
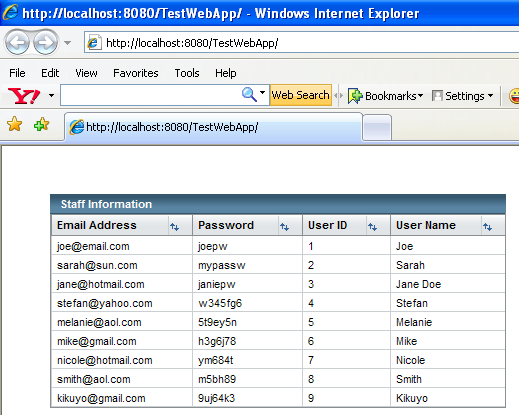
The Table component displays, and, if you created sample data for the database table, that data should be displayed as shown here.
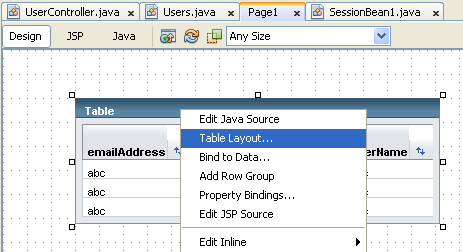
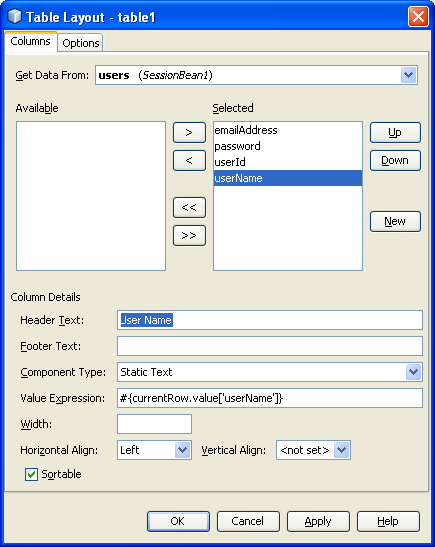
Finally to conclude this part let do some customization to our table properties. Select the table and right-click the Table Layout context menu.
Change all the column header to more meaningful words through the Header Text field.
Original Header | New Header |
emailAddress | Email Address |
password | Password |
userId | User ID |
userName | User Name |
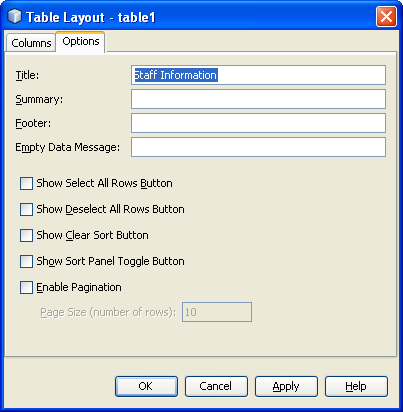
Click the Options tab and change the table’s title to Staff Information and click OK.
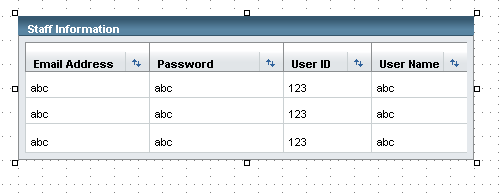
Re-run the TestWebApp project.
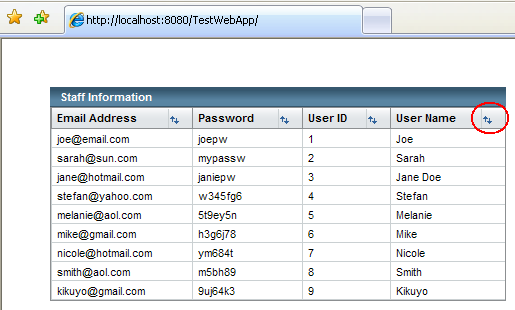
Next we resize the table’s columns by click-hold and drag the column’s border. Resize accordingly.

Re-run the TestWebApp project. Click the Up-Down arrow to sort user name.

Summary
This tutorial walked you through the necessary steps to use the Java Persistence API from a Visual Web application. It showed you how to set up and link together a Java SE project and a Visual Web JSF project. It also showed you how to create the database table and required keys and use the Java Persistence API to bind to the database. The tutorial supplied the custom Java code needed to access the database table, and it demonstrated how to create an entity bean to hold the table data. Finally, it showed you how to bind the entity bean to a Visual Web Table component, and the Table component simplifies displaying the database table data.
The second tutorial ("Modifying Database Table Rows with the Java Persistence API") shows how to use the API to add, update, and delete database table rows. Plus, it includes tips for getting the most from the NetBeans IDE and its visual web functions.
Deleting Java Derby Database
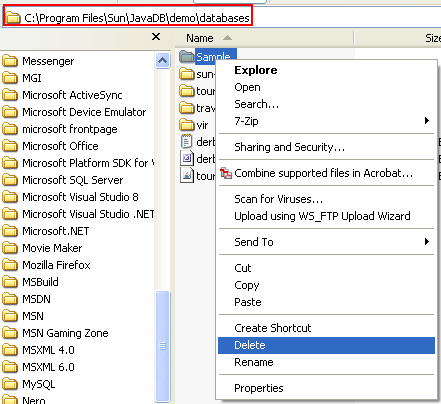
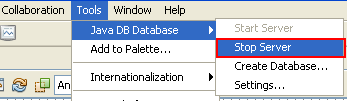
There is no DROP DATABASE command in Derby. To delete database that has been created you need to do it manually. First of all make sure the Java database server is stopped (either you are using Glassfish, Tomcat or others). If the Java database server is running, stop it through the following menu from the NetBeans IDE Tools menu.
Then go to Setting to see your Java Derby database path.
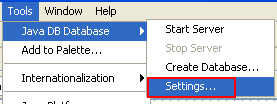
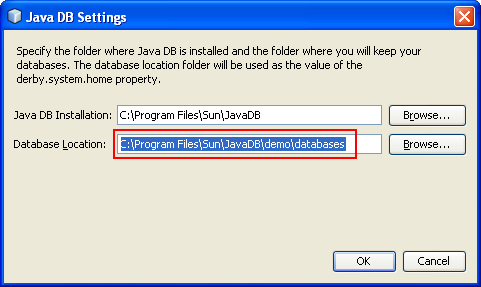
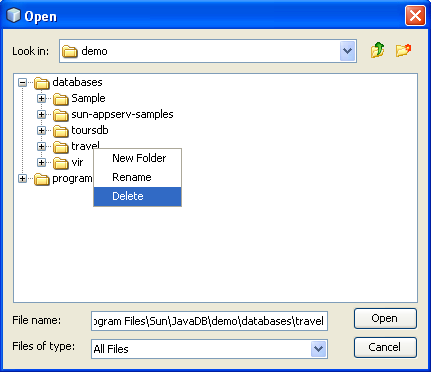
Click the Browse button on the right of the Database Location:. Select the database under the database folder > right click mouse > select the Delete context menu.
Alternately you can delete it manually through the Windows Explorer (also need to make sure the Java database server was stopped)