<Apache on Win 2003 Server |Java & Friends |Install PHP on Windows XP >
Install, Test and Use JDK 6 update 3 on Windows XP Pro
(Java 2 Standard Edition - J2SE)
In this tutorial we would like to install the Java Development Kit (JDK). This will prepare us for other applications or programs installation that depend on the JDK such as Eclipse PHP Development Tool (PDT), NetBeans IDE and the Java programming itself. The machine specifications used in this task are:
Contents:
Install the JDK
If your machines already have JRE, it is recommended you uninstall it because JDK will have its own JRE.
|
1. Firstly, download the latest JDK Standard Edition for Windows from sun.com. Double click the binary.

2. The following JDK installation wizard will be displayed. Click Next.

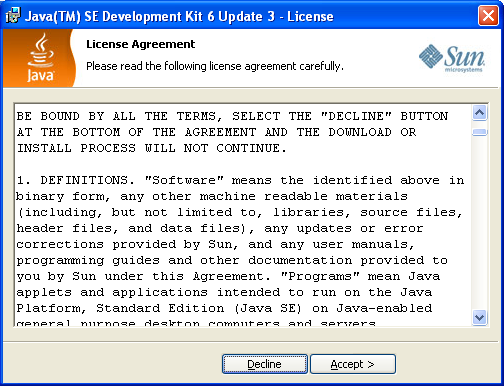
3. Accept the License Agreement.
4. By default all the components are selected. Click Next.

5. The JDK installation process begins.


6. For the second stage, select components that you want to install. In this case we select all components. Click Next when you finish.

7. The installation process starts.


8. The Java JDK SE installation completed successfully.

9. Read the README if you have time.

10.Before we test the JDK, let verify the JDK path in the Windows environment variables setting. Right click My Computer > Properties > Advanced tab > Environment Variables button > Select Path under System variable text field > Click Edit button. Make sure you see something like the following.
C:\Program Files\Java\jdk1.6.0_03\bin
and
C:\Program Files\Java\jre1.6.0_03\bin
11.Depending on your JDK installation path, add accordingly if there are none. In this case the Java JDK was installed in Program Files folder else change accordingly. This to make sure we can run Java binaries from any Windows relative path otherwise we need to use the absolute path to the Java binaries.
You may want to restart your machine to see if the environment variable be added else we need to add it manually. Well, we still can’t find the path to the java binary added to the environment variable, so we need to add it manually. Firstly let find the Java binary path.

12.It is C:\Program Files\Java\jdk1.6.0_03\bin. Let add the JRE together and the JRE path to binary is C:\Program Files\Java\jre1.6.0_03\bin
|

Test The JDK
1. Open Windows command prompt console and type path. This will display the Java binary path for confirmation on the task done before. Next, execute the following commands just to be familiar with some of the java command line tools and utilities.
2. Thejava tool launches a Java application. It does this by starting a Java runtime environment, loading a specified class, and invoking that class's main method.
C:\>java –h

3. Next, checking the JDK version by issuing the following command.
C:\>java -v

4. Thejavac tool reads class and interface definitions, written in the Java programming language, and compiles them into bytecode class files.
C:\>javac

5. Thejavah produces C header files and C source files from a Java class. These files provide the connective glue that allows your Java and C code to interact.
C:\>javah -h

6. Theappletviewer command allows you to run applets outside of the context of a World-Wide Web browser.
C:\>appletviewer

7. TheJava Debugger, jdb, is a simple command-line debugger for Java classes. jdb helps you find and fix bugs in Java language programs. There more java tools that you may wan to try on your own.
C:\>jdb -h
----------------------------------------------------------------------------------------------------------------------

8. Let try a very simple java program, compile it to bytecode using javac tool and run (parse or interpret) it in an orthodox, primitive way using java command line tool just to test our JDK. Use Wordpad or Notepad or other unformatted text editors, write the following Java code and save it with .java extension. Keep in mind that the class name and the java program file name must be similar. In this case it is Helloworld. Java is a case sensitive language.
//*************************************
// Helloworld.java
//*************************************
public class Helloworld
{
//-----------------------------------------------
// Just for fun!!! A classic Hello World program
//-----------------------------------------------
public static void main(String[] args)
{
System.out.println("Hello bastard Java World!");
System.out.println("HE..HE..HE..HE..HE...");
}
}
9. Compile and run using the following commands.
C:\> javac Helloworld.java
10.Run the bytecode (Helloworld.class).
C:\> java Helloworld

11.The following Figure shows the source code (Helloworld.java) and the bytecode (Helloworld.class).

12.Doing a java programming like this not a productive one. Later we will install, test and use other java IDE such as jGRASP and NetBeans. More JDK tools can be found atsun.com.
Some Java Fundamental Story
Java compiler and Java interpreter
It is beneficial in order to see the different between Java compiler and interpreter clearly we need to know the basic how Java applications are developed.
We start Java programming with writing the source code using text editor for example. This file will be saved as Java source code with extension .java. Then we compile the Java source code using Java compiler such as javac. Java compiler translates Java source code into Java bytecode. Java bytecode not an executable or binary file that ready to be run such as in traditional compiler such as C or C++ compiler. Java bytecode is a representation of the program in a low-level form similar to machine language code.
In order to run or execute the bytecode we need Java interpreter (or parser as term used in other interpreted language such as PHP). Java interpreter interweaves the bytecode translation and execution activities. Java interpreter reads Java bytecode and execute it on a specific machine. Java bytecode is not tied to any particular processor type, so Java is platform independent and therefore easily portable from one machine type to another.
However the machine must have Java interpreter such as java, Java Virtual Machine (JVM), Java Runtime (JRE) or bytecode compiler for each processor type on which the bytecode is to be executed. Java bytecode also could be compiled into machine code directly during the development phase. One of the compile and interpret disadvantage is this process is slower compared to the directly compiled method.
The Java compiler and interpreter can be summarized in the following Figure.

Java compiler and interpreter in Java build and run process
Java standard class library and Java packages
A class library is a set of classes (that contain objects and methods) that support the development of program. Class library is one of the code re-usability features of programming language and represent the fundamental object oriented principles data abstraction: encapsulation, inheritance and polymorphism. Routines or frequently used tasks have been group or bundled together with the compiler or development environment. What is needed is to learn how to use them and not how to create or re-create them from scratch that make programming tasks more productive.
Standard class library is a class library that has been tested, standardized and endorsed by standard committee and bundled together with any Java compiler or Integrated Development Environment (IDE). The non-standard Java class library also available however it is for specific Java application developments that supplied by third party vendors or companies such as for graphic manipulations, games, engineering and scientific applications.
Standard class library is made up of several clusters of related classes which are sometimes calledJava APIs or Application Programming Interface for example Java Database API for Java database programming and Java Swing API which refer to a set of classes that defines special graphical component used in graphical user interface (GUI) development.
The classes of the Java standard class library are also grouped into Java packages. In this case each class is part of a particular package. For example the String class is part of the java.lang package and so does the System class. The groups of classes that make up a given API might cross packages. Example of Java packages that are part of the Java standard class library are java.applet, java.awt, java.net and java.sql. The using of the dots (.) means a namespace. The following definition given by sun.com documentation:
"……A package is a grouping of related types providing access protection and namespace management. Note that types refer to classes, interfaces, enumerations, and annotation types. Enumerations and annotation types are special kinds of classes and interfaces, respectively, so types are often referred to simply as classes and interfaces……."
A Java package is a mechanism for organizing Java classes into namespaces. Java packages normally stored in compressed files called JAR files. We normally refer to Java packages when mentioning certain classes that contain the routines that we want to use. In real Java programming, the classes of the java.lang package are automatically available for use. However to use any other packages we must either fully qualify the reference or use an import declaration. The import declaration at the beginning of the program so that all the classes are available for the whole program.
For example, every time we want to refer to the Scanner class that is defined in java.util package, we could write java.util.Scanner in the source codes something like this:
...
java.util.Scanner scan = new java.util.Scanner(System.in);
...
Another method that is more productive way is by using the import declaration. The import declaration specifies the packages of classes that will be used in a program so that the fully qualified name is not necessary with each reference. For example:
import java.util.Scanner;
Then in the program we just use:
...
Scanner scan = new Scanner(System.in);
...
By using asterisk (*), any class inside the package might be used in the program. For example:
import java.util.*;
which will allows all classes in the java.util package to be referenced in the program without qualifying each reference. A collection of packages that Java developers can use to create full- featured Java applications is available in Java Foundation Classes (JFC).
Java source code file and bytecode file.
As explained before, source code file is a file that contains Java source codes. The file extension is .java. For example if we create a very simple Java program using Java IDE such as JGRASP or NetBeans, during the Java application’s project creation, the program request us to put the project name, for example helloworld. This file will be helloworld.java and then we can start to do the coding.
When we finish the coding work, we can start compiling usingJava compiler. If our compiling process is successful the Java source code will be translated into Java bytecode. This bytecode is stored in the .class file extension. From our previous example if the source file is helloworld.java, the bytecode file that generated after the source code file been compiled is helloworld.class. The process can be simplified in the following Figure:

Java source code file and bytecode file in Java build and run process
We can use any text editor to write Java source code and normally it should be unformatted text editors such as WordPad, Notepad or vi. However for serious developer they will use Integrated Development Environment (IDE) such as Netbeans or Java Studio that come with other advanced features and tools.
Obviously, for bytecode file, it is generated by Java compiler and it is not useable until we run it using Java interpreter or parser such as JRE, JVM or java. The java bytecode is platform independent. What we need to run this bytecode is Java interpreter. Java interpreter is specific to a platform.
Java Primitive data type variable and object reference type variable
Java programming language is typed based language. For typed based languages, when we declare a variable, we need to include its type. In object oriented programming languages, type can be categorized into two kinds:
-
Primitive data type variable.
-
Object reference type variable.
Primitive data type includes fundamental values such as number and characters. It is traditional and non-object oriented language data type. Object usually represents more complex variables that mimics or try to represent the real objects in the real world. In Java there are eight primitive data types as listed in the following Table.
No | Primitive type | Keyword |
1 | 4 subset of integer | byte, short, int and long |
2 | 2 subset of floating point numbers | float and double |
3 | A character data type | char |
4 | A boolean data type | boolean |
Java primitive data types | ||
In Java, other than primitive data type, variables are represented using object. Object reference type variables have a state and a set of behaviors. State represents characteristics that currently define the object while behaviors of an object are the activities associated with the object.
In Java program, object’s state represent attributes that are values stored internally which may be a private data or as other object. The behavior which may be represented by methods, that is a group of programming statements that is given a name.
As a whole, object is defined by a class. A class is a model or blueprint from which an object is created. When we declare an object reference type variable, we will said that we instantiate an object. In a program we create new object such as Scanner using a new operator. Then we were able to invoke its methods such as println().
In the Java code, the println() is a method that provides a service. This service provided by the System.out object, which represents the standard output stream. The declarations of object and primitive variables have a similar structure. For example:
int my_num;
String my_name;
The first one is a primitive data type variable, creating a variable that holds an integer value. The second one is an object reference variable, creating a String variable that holds a reference to a String object. Contradict to the primitive data type variable, an object’s value doesn’t hold an object itself but the address of an object, where the real data stored.
Both previous declaration examples don’t have initial values or they are said uninitialized variables and graphically, in memory can be depicted by the following Figure.

Illustration of primitive and object declarations (uninitialized)
Hence, the act of creating an object using the new operator is called object instantiation. Then, an object is said to be an instance of a particular class. The new operator returns the address of the new object. By extending the previous example:
my_num = 100;
my_name = new String("James Bond 008");
After these statements are executed, those variables can be depicted as:

Data allocation in primitive and object initializations
Where xxxxxx is a memory address. In primitive data type the variable holds the data directly while for reference object the variable just hold a reference address of the real data and it can be said as a pointer to the location in memory where the object is held. Primitive data type variables are available and used in non-object oriented programming such as C language whereas the object reference data type variable only available and used in object oriented language such as Java and C++.
Case sensitive language and free format language
Java is a case sensitive programming language. In the case sensitive language, any two identifiers such as variable names that differ only in the case of their letters are considered to be different identifiers. For example number, Number, numBer, NUMBER and many more variation based on this single word are all different identifiers. While in free format language such identifiers: number, Number, numBer and NUMBER will be treated as a similar identifier that is 'number'.
Java Program Examples
Let try Java program example. This simple example compiled usingjGRASP.
Suppose that
You get a monthly pay (before tax) with an amount of monthlyPay
Your tax rate is taxRate
Your expense a year has an amount of expense
Write a Java program to:
calculate your annualPayAfterTax
calculate your netIncome
print out your monthlyPay in the first line
print out your taxRate in the second line
print out your annualPayAfterTax in the third line
print out you expense in the fourth line.
print out your netIncome in the fifth line.
A Sample output will look something like this:
My monthly pay is $2555
My tax rate is 0.33
My annual pay after tax is $20542.2
My expense a year is $5000
My net income a year is $15542.2
Remark:
taxRate is not an integer! You should declare its type as double.
annualPayAfterTax = monthlyPay * (1-taxRate)*12.
netIncome = annualPayAfterTax – expense.
Since taxRate is not integer, annualPayafterTax and netIncome are also have to be declared as double; otherwise, you will get error message from compiler.
Answer:
import java.util.Scanner;
/**
* @author Mikerisan
*/
public class MyIncome {
//---------------------------------------------------------
// Calculates and prints my yearly income and related items
//---------------------------------------------------------
public static void main(String[] args)
{
final double taxRate = 0.33;
double monthlyPay, expense, annualPayBeforeTax, annualPayAfterTax, netIncome;
Scanner readmonthlypay = new Scanner(System.in);
// prompt user for input
System.out.println("Enter your monthly pay: ");
// read and store input
monthlyPay = readmonthlypay.nextDouble();
Scanner myexpense = new Scanner(System.in);
// prompt user for input
System.out.println("Enter your yearly estimate expenses: ");
// read and store input
expense = myexpense.nextDouble();
// prints monthly pay
System.out.println("My monthly pay is USD" + monthlyPay);
// prints tax rate
System.out.println("My tax rate is " + taxRate);
// calculate yearly income
annualPayBeforeTax = (monthlyPay * 12);
// prints annual pay before tax
System.out.println("My annual pay before tax is USD" + annualPayBeforeTax);
// calculate yearly income after tax
annualPayAfterTax = annualPayBeforeTax *(1-taxRate);
// prints annual pay after tax
System.out.println("My annual pay after tax is USD" + annualPayAfterTax);
// prints yearly expense
System.out.println("My expense a year is USD" + expense);
// calculate yearly net income
netIncome = annualPayAfterTax – expense;
// prints yearly net income
System.out.println("My net income a year is USD" + netIncome);
}
}
A Sample Output:
Enter your monthly pay:
6000
Enter your yearly estimate expenses:
20000
My monthly pay is RM6000.0
My tax rate is 0.33
My annual pay before tax is RM72000.0
My annual pay after tax is RM48239.99999999999
My expense a year is RM20000.0
My net income a year is RM28239.999999999993
The following Figures show the steps using Java command line. Firstly we compile the source code that will generate a bytecode. Make sure there is no error.

After the MyIncome.class bytecode has been generated, we can run the bytecode by specifying the classpath to the file.

Theclasspath can also be set in the Windows Environment Variable however it is not recommended. More Java program examples can be found in thejGRASP tutorial.