<Java & Friends Activities | Apache on Win 2003 Server >
Installing and Testing Apache Web Server 2.2
On Windows XP Pro
In this Apache web server installation activity, we 'assume' that the IIS or PWS or other web servers not installed (or the service or application not started or running if installed) because web server will use port 80 by default. It is OK if those web servers use different ports. We start with Apache because during the PHP installation, Apache’s configuration file location or path will be asked.
The machine specifications used to complete this task:
-
Intel Pentium Core 2 Duo, 2.2 GHz,
-
Windows XP Pro SP2 + periodical patches + periodical updates…
-
2 GB DDR2 RAM.
-
160 GB SATA HDD.
-
17” SyncMaster 713N monitor.
-
Apache 2.2.4 web server for Windows.
1. Go to Apache.org site to downloadthe latestApache for Windows. In this case we downloaded the Windows msi installer version.
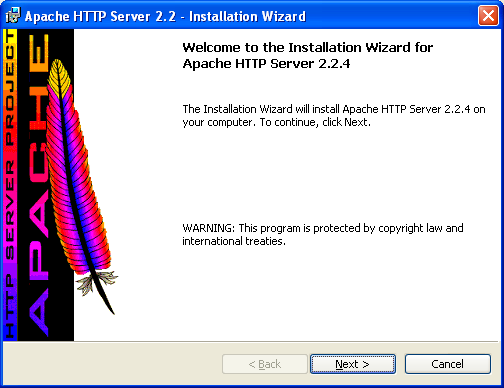
2. Double click the msi file. Click the Next of the welcome wizard page.
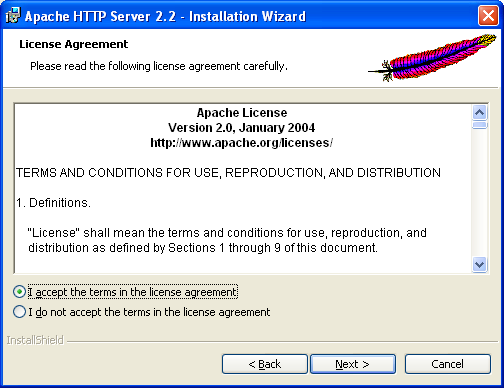
3. Accept the License Agreement and click Next.
|

4. Read the information on running Apache on Windows. Read it and then click Next after finished.

5. Fill in the server information. We will uselocalhost, without any domain. You should change those accordingly if you setup Apache on the production server. Select first radio button, for all user, on port 80, as a service. We can set install Apache for specific user that login to the server. We can change these settings later by editing the Apache configuration file, httpd.conf if needed. Click the Next button.

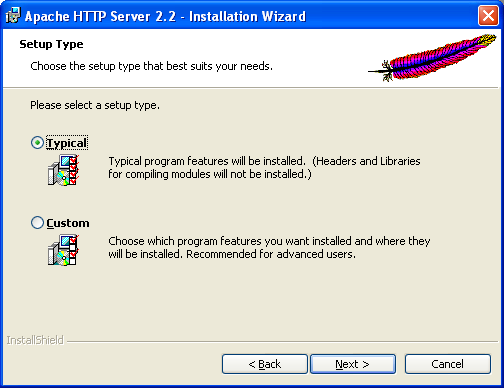
6. We will use typical setup type, so select theTypical radio button and clickNext.
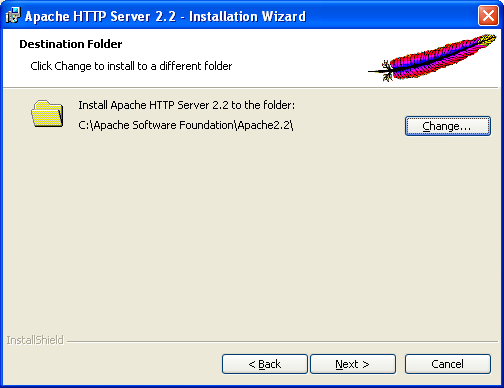
7. Set the Apache installation destination folder. In this case we will change the destination folder outside the C:\Program Files folder. The issue of Apache installation folder mostly related to the security of the web server itself. Click the Change button.
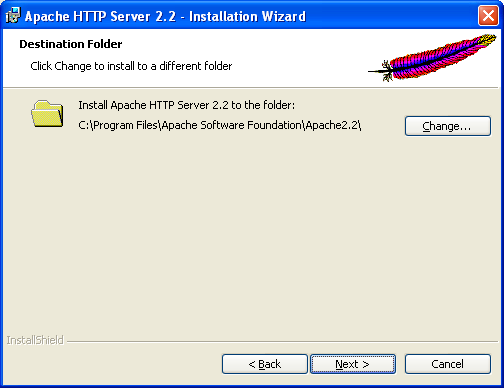
8. Change the folder to C:\Apache Software Foundation\Apache2.2\ and click OK.

9. Confirm our destination folder and click Next.
10.The wizard is ready to install, click Install.

11.The installation is starts. Any error will be prompted, so don’t worry.
|
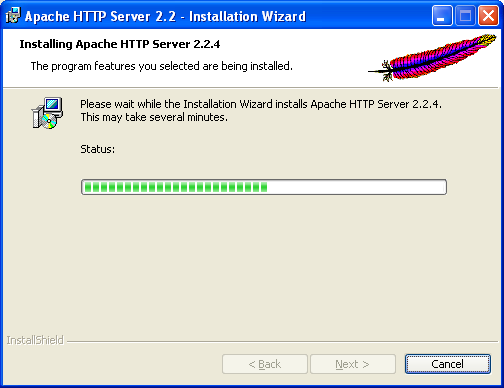
12.You will see the following windows console during the installation.

13.If your system displays Windows Security Alert shown below, please unblock it.

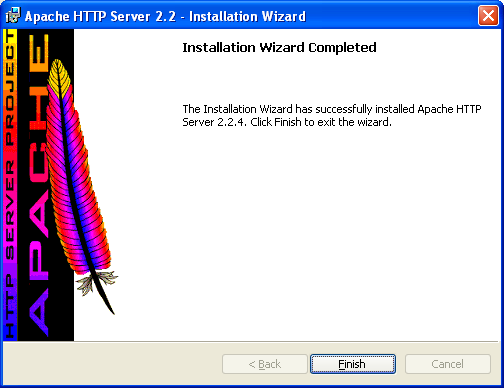
14.The following wizard page means the installation was completed. Click the Finish button.
15.Verify the Apache HTTP Server 2.2.x in theStart > All Programs > Apache HTTP Server 2.x.x. You can configure the httpd.conf file, stop, start and restart the Apache service, monitor the Apache server and review the server log files.

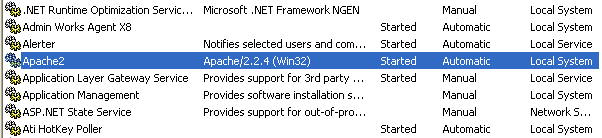
16.Check the Apache2 service in Windows Services snap in.
17.If the Apache service is running, you can see the eagle fur with green arrow as shown below in the icon tray, bottom-left.
![]() - Apache is running.
- Apache is running.
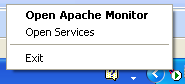
18.If Apache is not running, the icon is red square as shown below. You can right click mouse on the icon and open the Apache Monitor or the Windows Services snap in.
![]() - Apache is dead.
- Apache is dead.
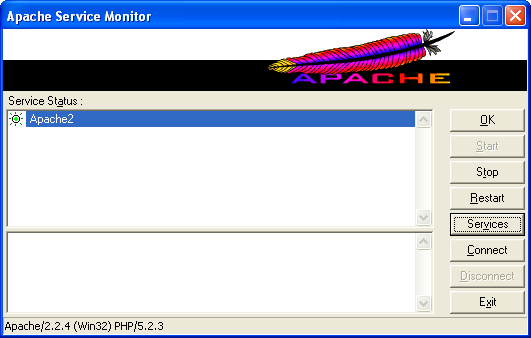
19.The following is the Apache monitor.
20.When seen through Windows Task Manager, the process name is httpd.

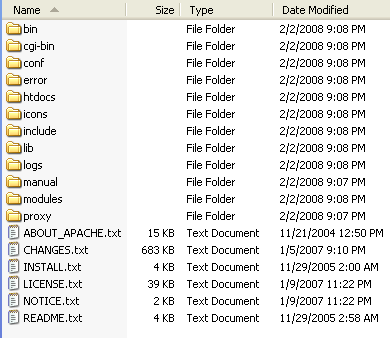
21.The following Figure shows the files and folders under the Apache installation folder, C:\Apache Software Foundation\Apache2.2\.
22.The configuration file is httpd.conf under the conf folder and this file can be opened in any text editor.

23.The default web root folder is htdocs. All your web files and folders will be put in this folder if you are using the default web root folder.

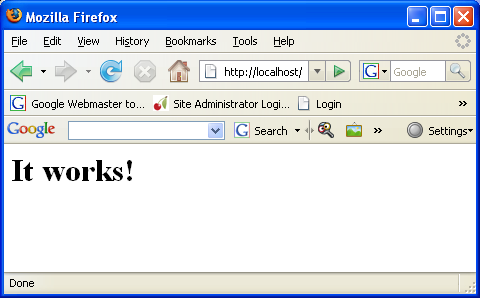
24.The default root directory for web files ishtdocs. Let test our Apache web server through browser by using http://localhost or http://127.0.0.1. There is already an index.html file provided by default. Open your browser, type http://localhost or http://127.0.0.1 and hit the Enter key. You will be greeted by the following page.

25.We can open the httpd.conf file through the Start menu as shown below.

26.The following is the content of the Apache configuration file. We need to edit this file to suit our specific needs of the web server.

27.The following section shows some portions of the Apache configuration file content. We do not change anything here. Most of the default setting already provided for us. We need to uncomment the line (remove the #).
The following is the setting of the web server root folder.
# ServerRoot: The top of the directory tree under which the server's
# configuration, error, and log files are kept.
#
# Do not add a slash at the end of the directory path. If you point
# ServerRoot at a non-local disk, be sure to point the LockFile directive
# at a local disk. If you wish to share the same ServerRoot for multiple
# httpd daemons, you will need to change at least LockFile and PidFile.
#
ServerRoot "C:/Apache Software Foundation/Apache2.2"
28.The following is the load module setting part. All required modules that need to be loaded will be defined in this section.
#
# Dynamic Shared Object (DSO) Support
#
# To be able to use the functionality of a module which was built as a DSO you
# have to place corresponding `LoadModule' lines at this location so the
# directives contained in it are actually available _before_ they are used.
# Statically compiled modules (those listed by `httpd -l') do not need
# to be loaded here.
#
# Example:
# LoadModule foo_module modules/mod_foo.so
#
LoadModule actions_module modules/mod_actions.so
29.The following is the path for the first document that will be served by our web server if the domain name or IP address typed in the browser address bar.
# DocumentRoot: The directory out of which you will serve your
# documents. By default, all requests are taken from this directory, but
# symbolic links and aliases may be used to point to other locations.
#
DocumentRoot "C:/Apache Software Foundation/Apache2.2/htdocs"
30.The following is the setting when user types a directory in the browser address bar. In this case, serve the index.html file when user types a directory instead of the url.
</Directory>
#
# DirectoryIndex: sets the file that Apache will serve if a directory
# is requested.
#
<IfModule dir_module>
DirectoryIndex index.html
</IfModule>
31.The following is the setting for the script parser that needs to run. In this example it is Perl script.
# Apache parses all CGI scripts for the shebang line by default.
# This comment line, the first line of the script, consists of the symbols
# pound (#) and exclamation (!) followed by the path of the program that
# can execute this specific script. For a perl script, with perl.exe in
# the C:\Program Files\Perl directory, the shebang line should be:
#!c:/program files/perl/perl
# Note you _must_not_ indent the actual shebang line, and it must be the
# first line of the file. Of course, CGI processing must be enabled by
# the appropriate ScriptAlias or Options ExecCGI directives for the files
# or directory in question.
32.The following is the customization of the standard web error handling. We can point to a custom error pages, run a script or just to display a text messages.
# Customizable error responses come in three flavors:
# 1) plain text 2) local redirects 3) external redirects
#
# Some examples:
#ErrorDocument 500 "The server made a boo boo."
#ErrorDocument 404 /missing.html
#ErrorDocument 404 "/cgi-bin/missing_handler.pl"
#ErrorDocument 402 http://localhost/subscription_info.html
#
33.There are many more configurations that you can customize it. Please read the documentation atApache.org. You can open the access and error log files for debugging if something wrong with your Apache activities.

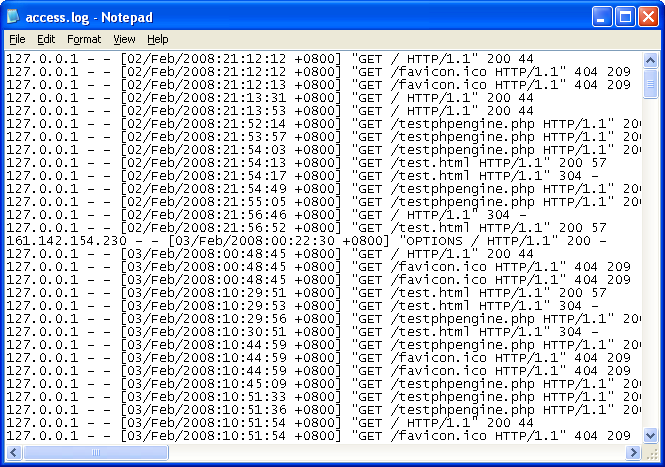
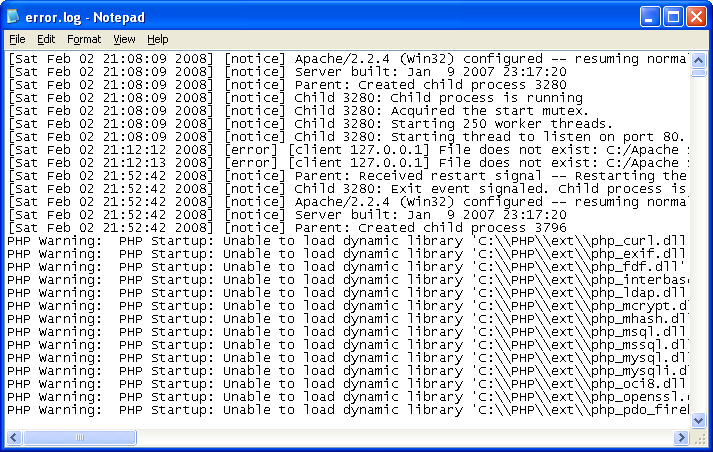
34.The following Figures show the access and error logs file contents respectively.
Other Java tutorials at javaguicodexample.com that use the web server as a testing bed will deployGlassfish which is bundled together with the NetBeans package installation. Other web servers that can host Java applications includeJBOSS,Sun Java Web Server and TOMCAT (included in the NetBeans package installation). More Java based web server can be found inOpen Source Web Servers in Java.